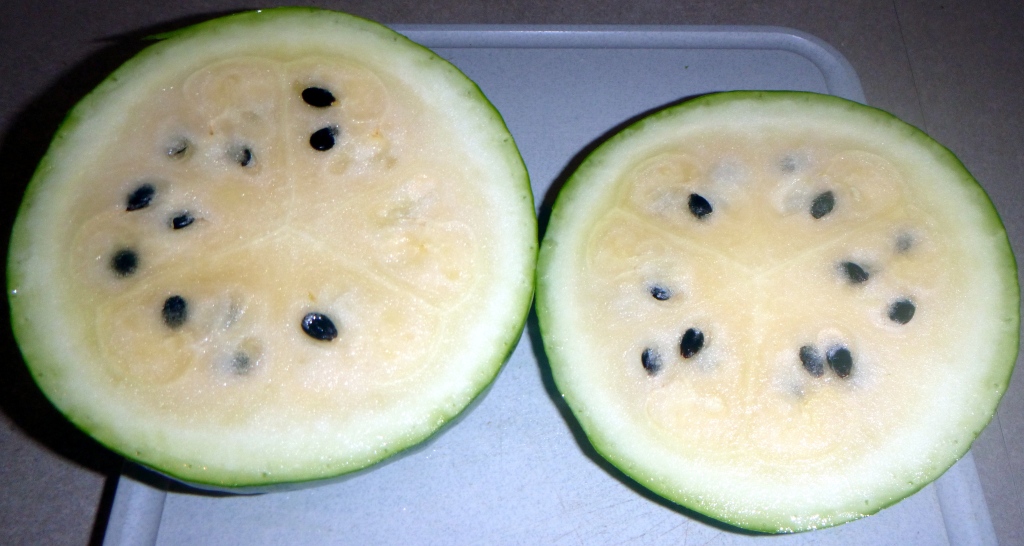
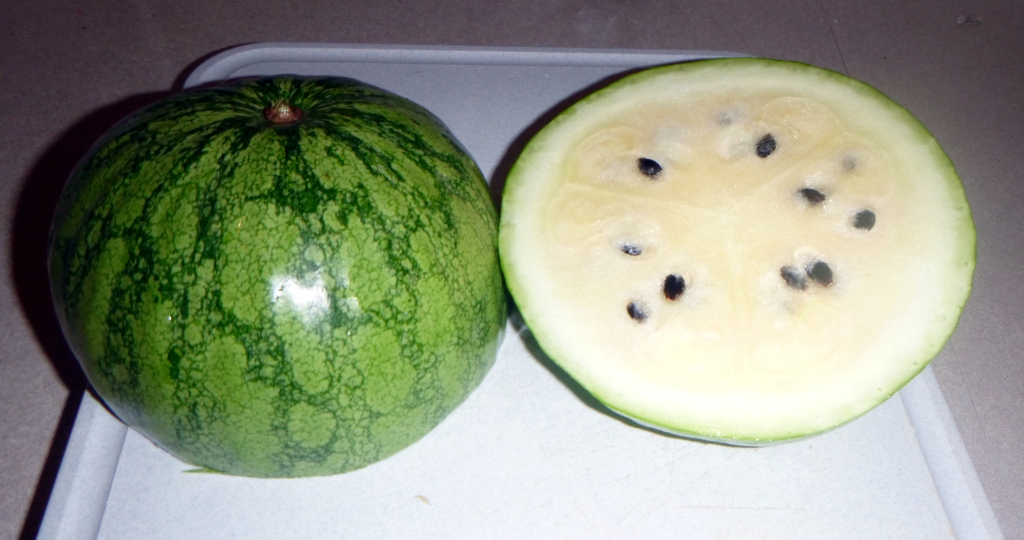
So today I decided to open my “Christmas Watermelon” that is a sub-project of my [citron melon x domestic watermelon] breeding project that is on the Experimental Farm Network. It is the hope to breed a citron-watermelon hybrid to be a sweet winter edible watermelon that is harvested before the first snow at the end of fall and stored and eaten several months later at Christmas or New Years.
The color of the flesh was yellow, brix sugar content was only 4% however so it was sadly not sweet. But last tested citron melon (pure or hybrid) tested was only at 2%. It kind of tasted like maybe it was not ripe yet (maybe I should have waited till New Years?). But on the other hand it had soft flesh, so it probably was ripe for a citron-melon hybrid. Needs some continued breeding work / selection. Maybe worth hand crossing with a known sweet winter watermelon variety.
Actually there are already such types of watermelon rumored to reside in Russia. Apparently they get sweeter over time and taste the best on New Years. Something that seems eerily like a citron-melon trait. And since there were [citron-melon x watermelon] hybrids back in the 1950’s in the USSR watermelon breeding station, I would not be surprised if Kholodok / Holodok has such ancestry (it certainly has the skin/rind patterns that are citron melon like).
Russian ‘Kholodok’ Watermelon variety (Холодок) Aka. ‘Holodok’ or ‘Chill’
This past year I was attending Colorado State University for a degree in plant breeding in the department of soil and crop sciences. While I was there I had the wonderful opportunity to join a lab that is working on all kinds of interesting atmospheric and plant-related sensors and IoT electronics that could change the way gardeners, farmers, and scientists work. And all of this with an Open Source mindset in terms of both hardware electronics and code, and with a low-cost aim to boot. For me, an open source enthusiast, this was a once-in-a-lifetime opportunity to partner with like minds. It is rare to find a university lab running on an open source philosophy as higher academia tends to want to patent and lock down innovation when it has any potential to produce money and income. It was awesome. But sadly, due to COVID, funding changes, and school changes, the lab had to let me go.
This however has not slowed my interest in continuing to develop my own low-cost open source solutions for my own garden, plant breeding projects, and farming endeavors. My first interest is for my own purposes, but I wouldn’t mind partnering with others of a similar mindset or who have skills that I don’t posses. My electronics knowledge is all self taught and I am very far from an electrical engineer, so any and all help is appreciated as I have many gaps in my understanding of electronic theory. I also wouldn’t mind assembling and selling these for others to use if I or we were able to come up with something that is better that anything currently out there. Something I really do think is possible.
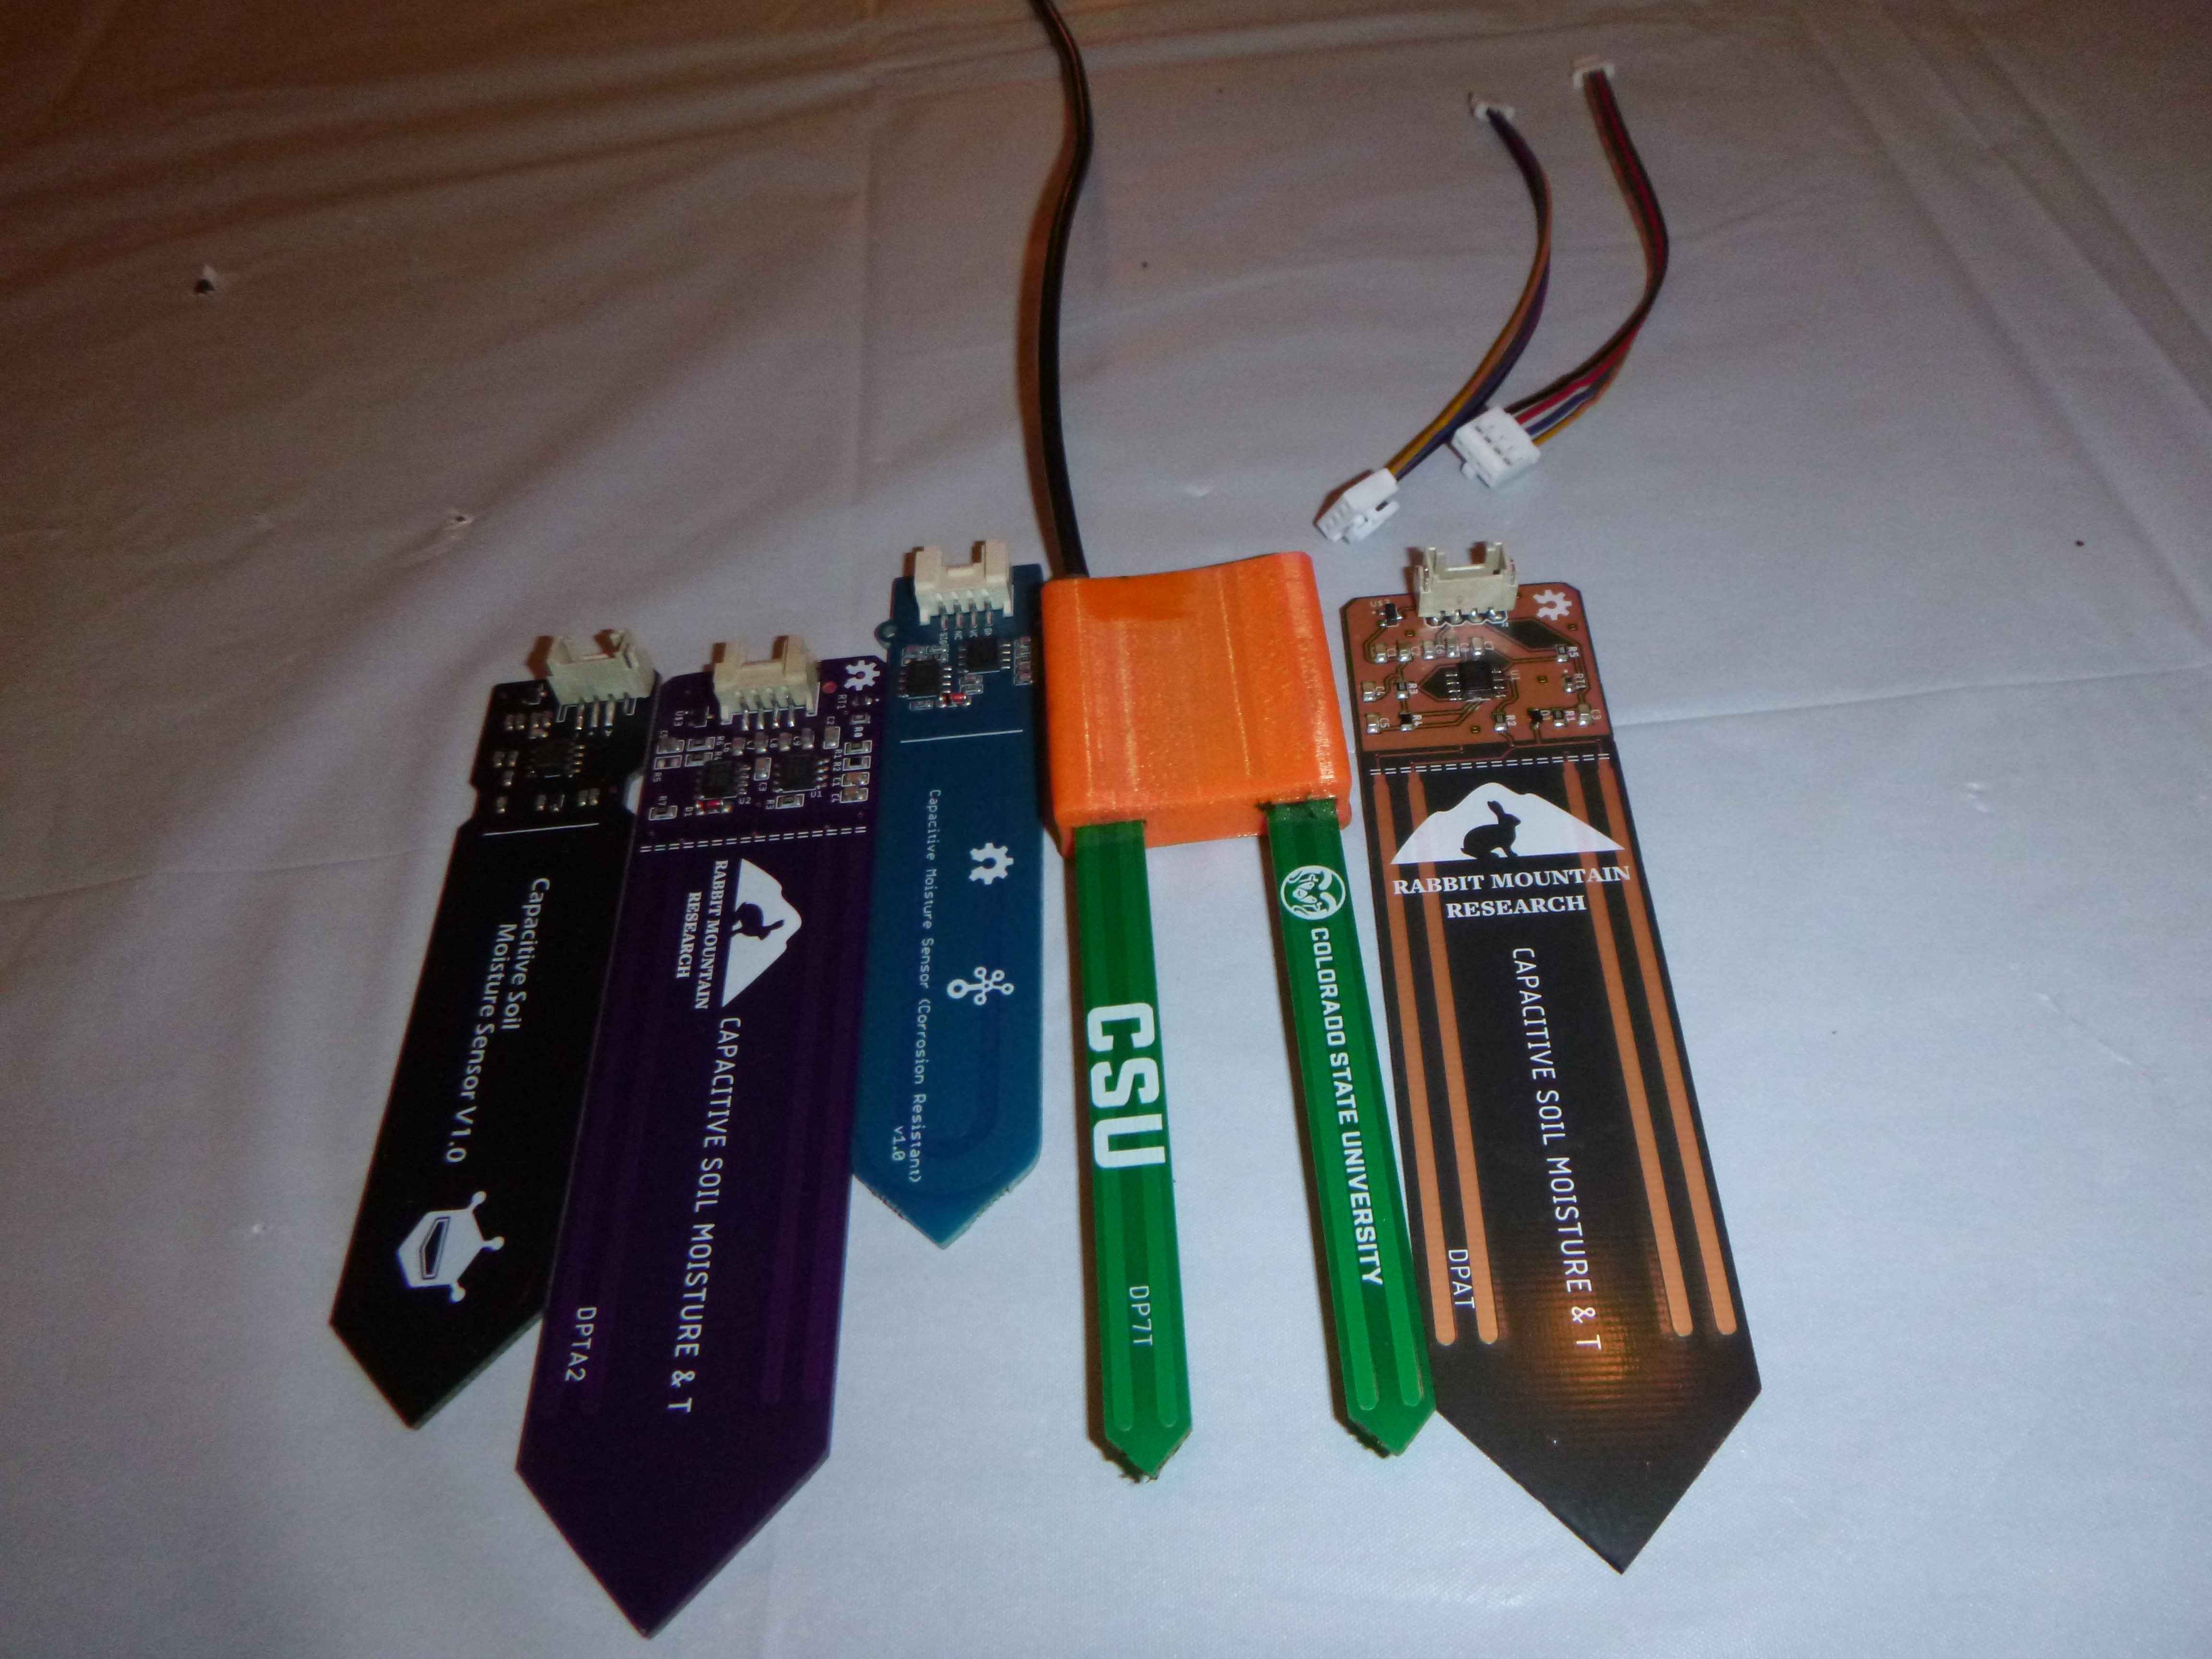
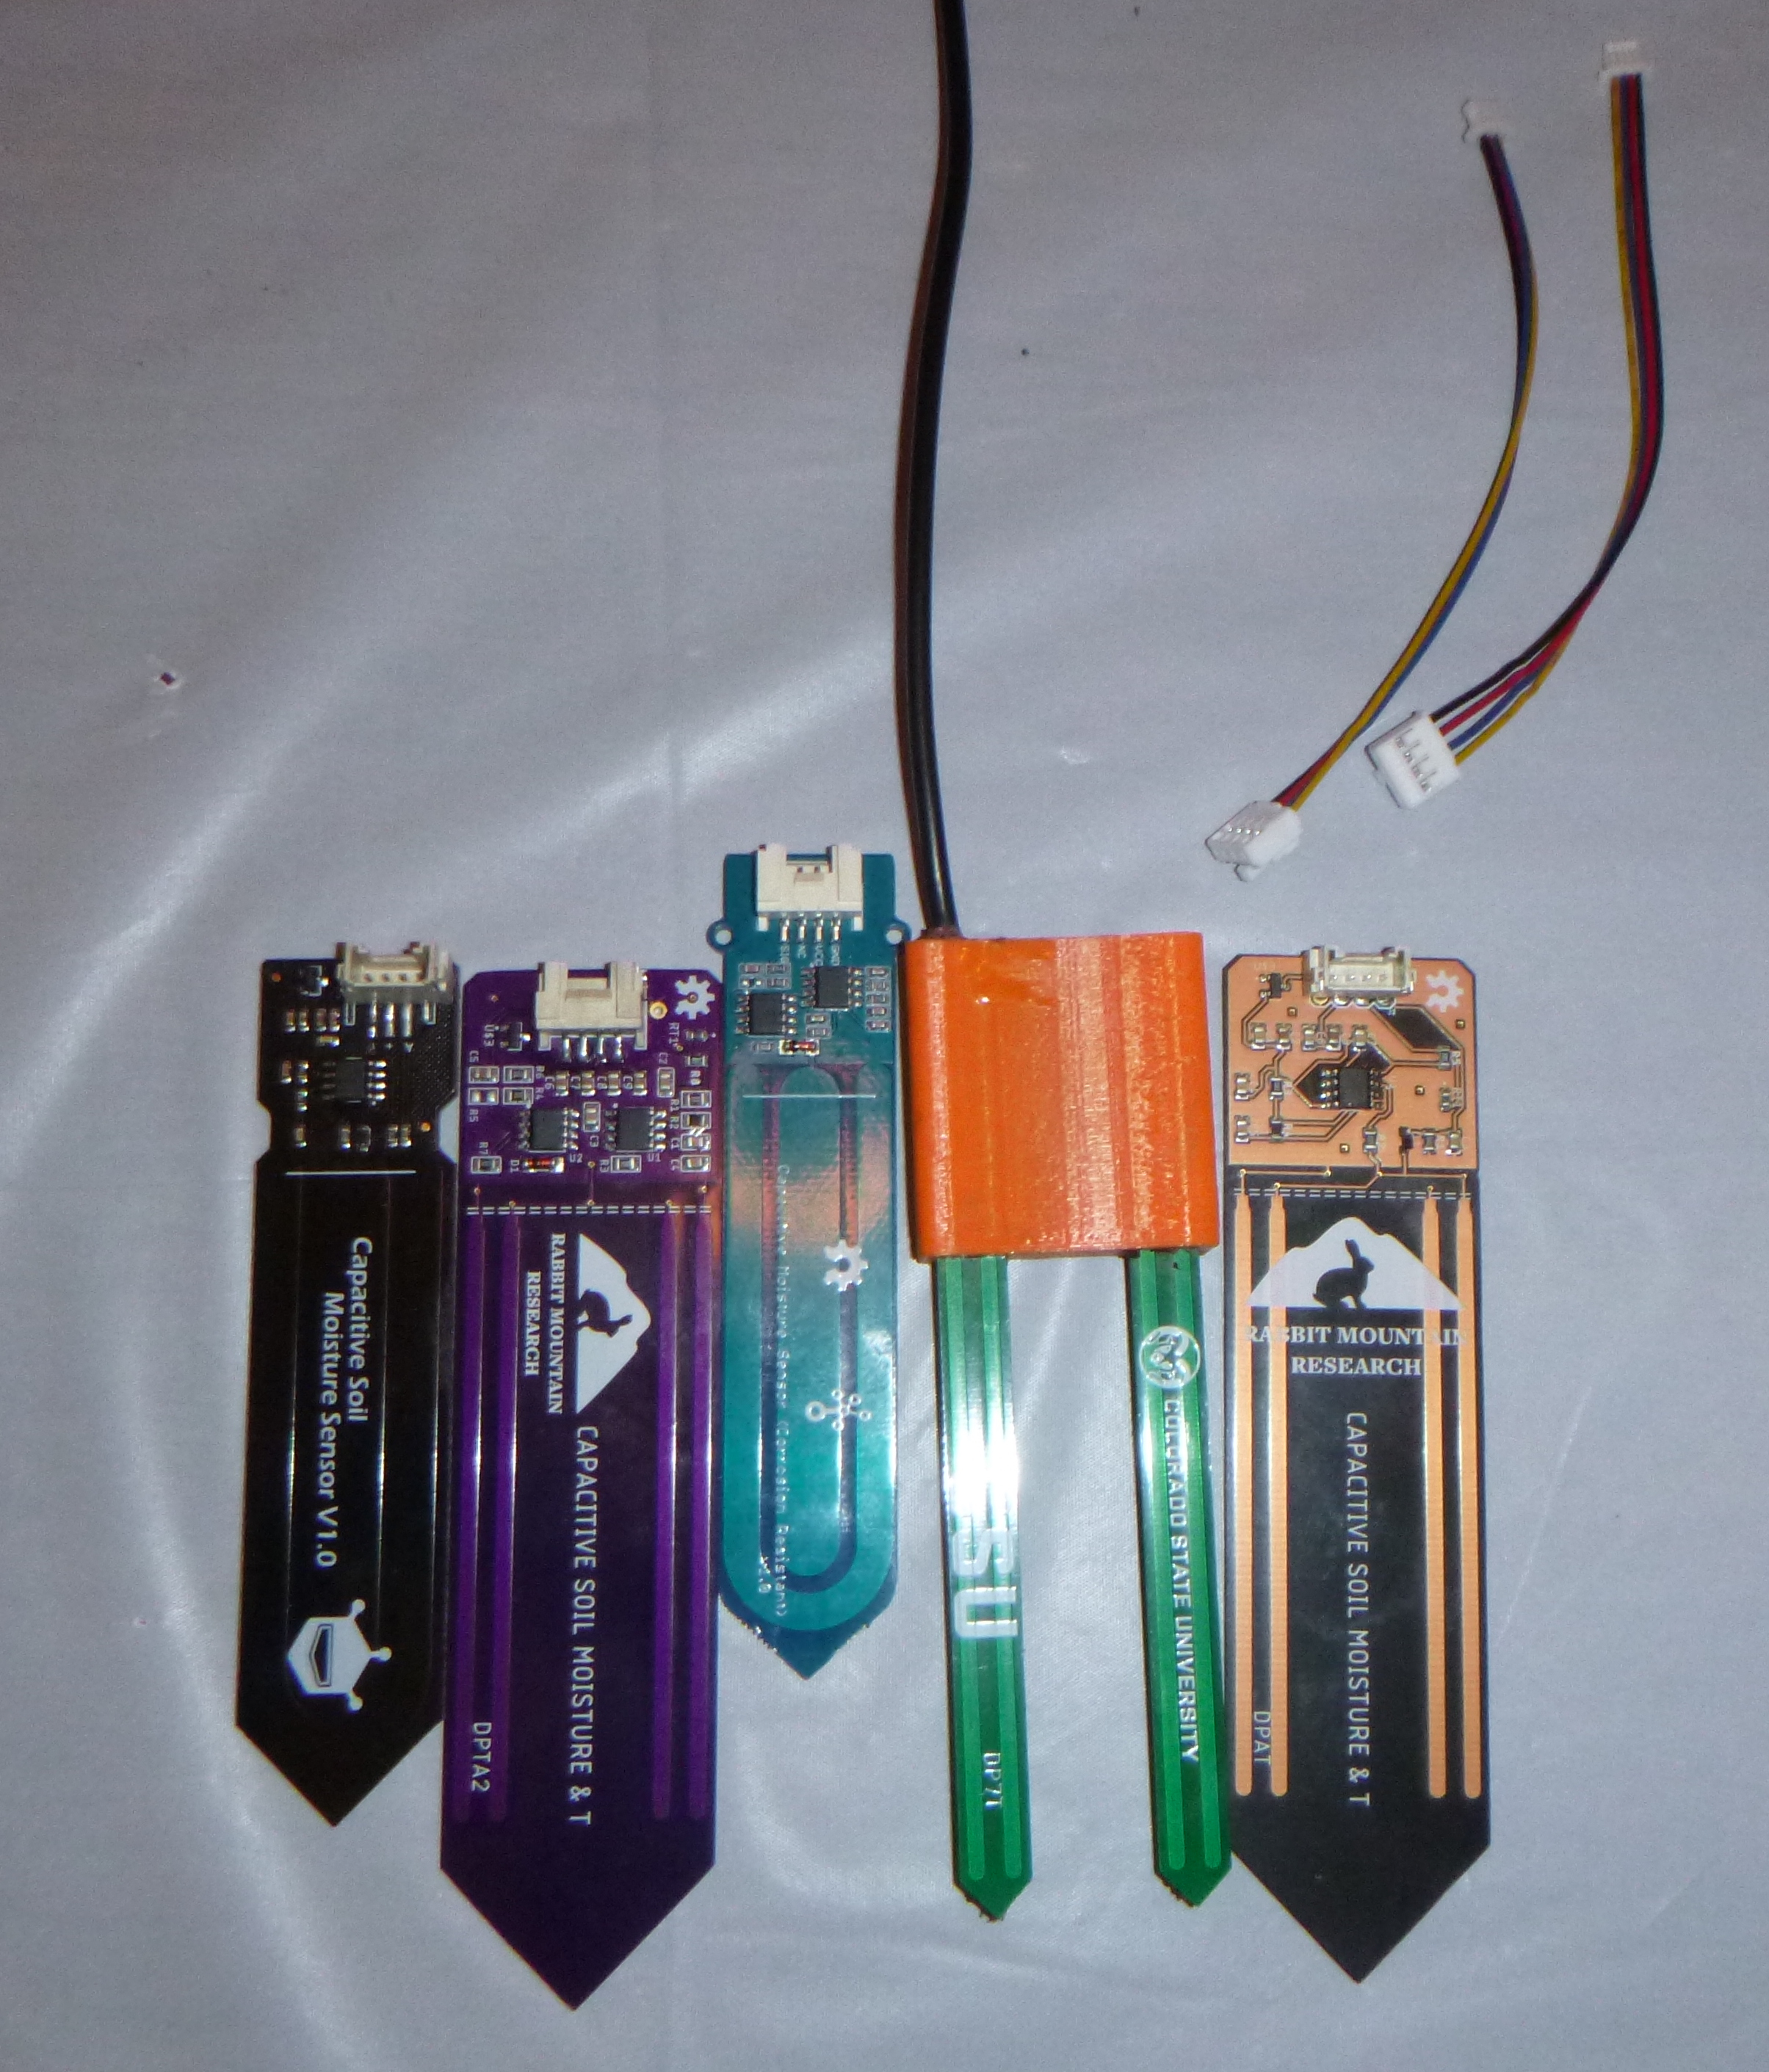
This past week I’ve been tinkering with my own capacitive soil sensor prototypes. The first design I have been working on is basically a clone of the current Capacitive Soil Sensor being developed at Colorado State University and uses a 555 oscillator based circuit that is similar to the cheap DFRobot sensors already available. However, the CSU sensor is currently superior to these DFRobot sensors and seems to have a decent range of sensitivity. A good starting point I think. Ironically, my first prototype, a nearly exact clone of this CSU sensor design actually performs BETTER than the original. The only real difference is the original CSU sensor has two prongs which are mechanically very fragile and easy to break. My design saw to make it one piece again for stability purposes. The only other difference is that I ordered it with clear silkscreen.
After testing both my prototypes along with the CSU, DFRobot, and Seeed Studio sensors, it seems to me that they seem to function from worst to best from darkest PCB soldermask color to lightest. Black, purple, and blue being the worst and clear being the best. Despite PCB manufacturers assuring me that the silkscreen makes no electrical difference, I suspect that the cobalt and carbon in the darker colors may have a discernible effect on the dielectric / capacitance of the PCB or the oscillator circuit. Since this is basically a capacitance sensor based on those PCB traces and oscillator circuit it may have an effect on this type of sensor where it would not be a problem somewhere else.
Since I am not an electrical engineer I am left with only this suspicion and having to order more PCB prototypes in other colors to test whether my theory is right or wrong. If they perform exactly the same as the other board with the exact same circuit then I will know I’m wrong. However, if one of the lighter colors functions better (with clear being the best) then I will know I am correct. I have yet to test yellow, red and white. And my second prototype I only ordered in purple, so I will need to order that one with clear.
The second prototype capacitance circuit is basically a clone of the Seeed Studio sensor with some modifications. After stumbling upon this webpage I got the impression the DFRobot circuit is flawed, and felt like the Seeed Studio circuit with the op-amp seemed better. As of now this does not seem to be the case in my testing, but this could be because my PCB is purple and therefore performs worse than it might in another color (like green, as the CSU sensor, or clear).
If anyone has any insight as to what the above link is actually saying, please let me know. Much of it was way over my head. I only got the impression that part of that circuit may be sloppy. But then again, maybe not if it actually works?
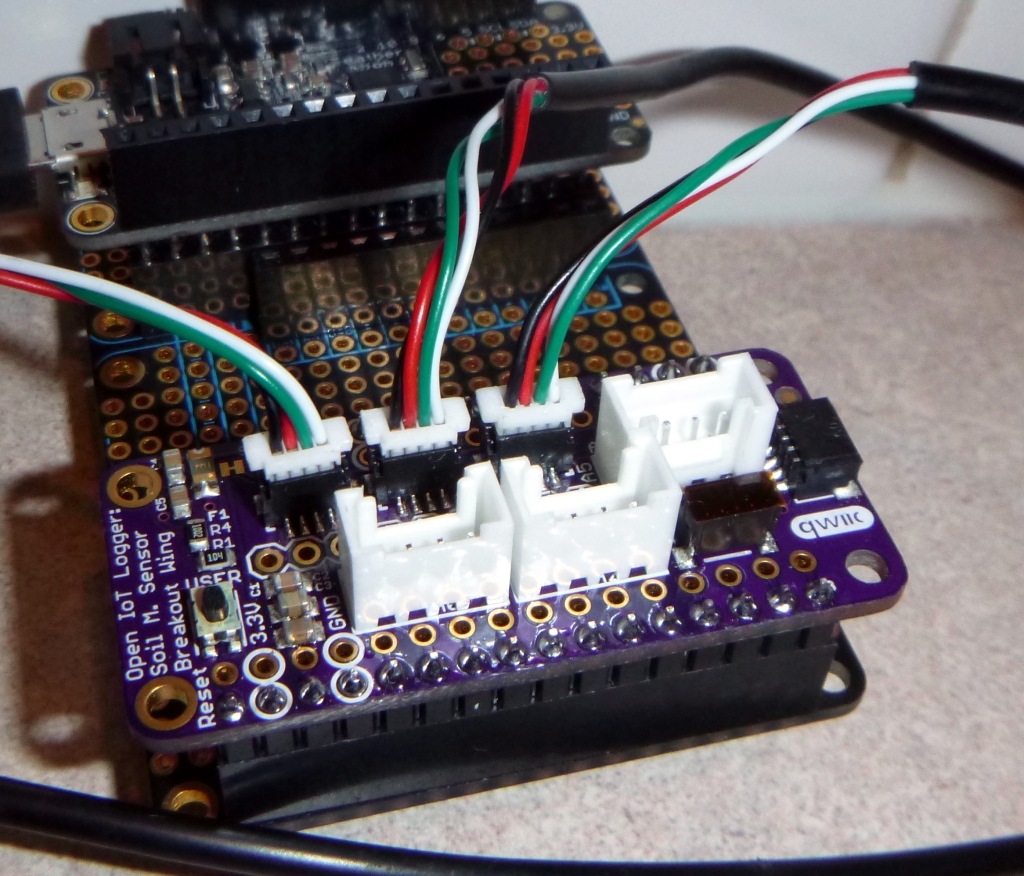
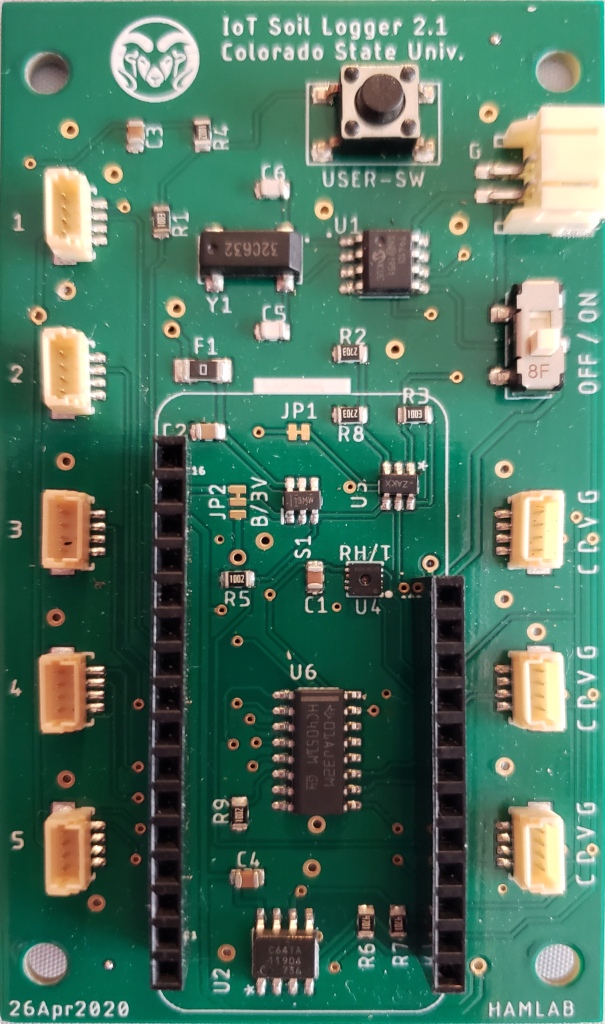
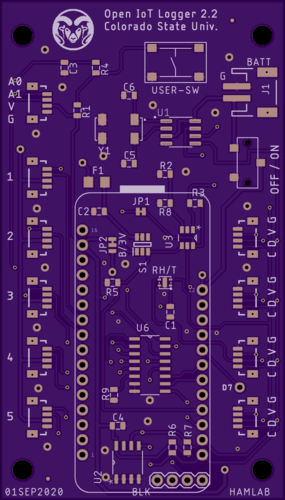
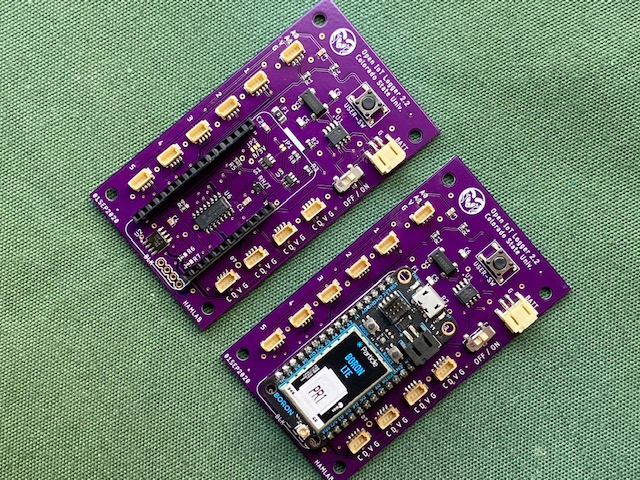
In order to test these sensors and keep the ability to interface to the CSU soil sensors i had that they designed to confusingly use the QWIIC connector (despite not being I2C sensors and instead analog) I designed and made my own Featherwing adapter board that uses most of the main components of Colorado State University’s new Open IoT Logger Carrier board, which is being designed for IoT farming sensors. The main feature of this carrier board is that it is being designed to use low-powered devices like the Particle Boron or ESP32 Feather and have a RTC and a transistor switch so it can use deep sleep and run for over a year on battery power alone. CSU has made great strides in this effort and I expect to see some interesting developments coming from them in the next year.
So it has been awhile since I worked on this project, but I am happy to report that after a few weeks of minor frustration with marlin hiccups I have now started to make big progress again.
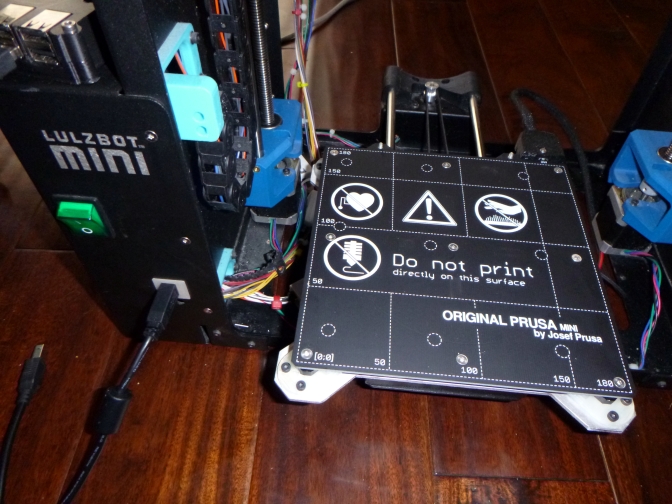
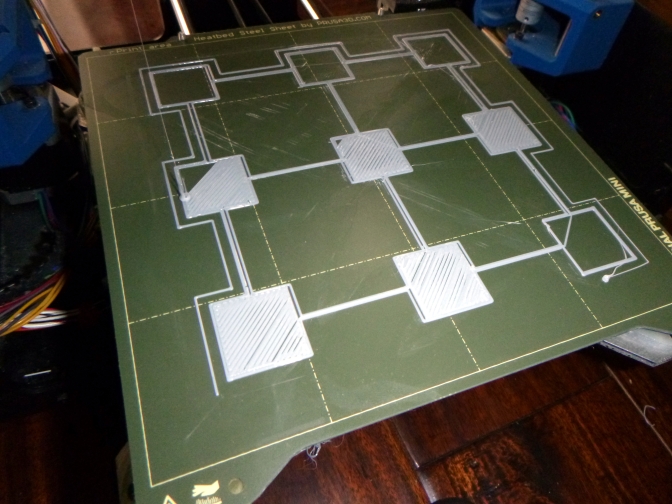
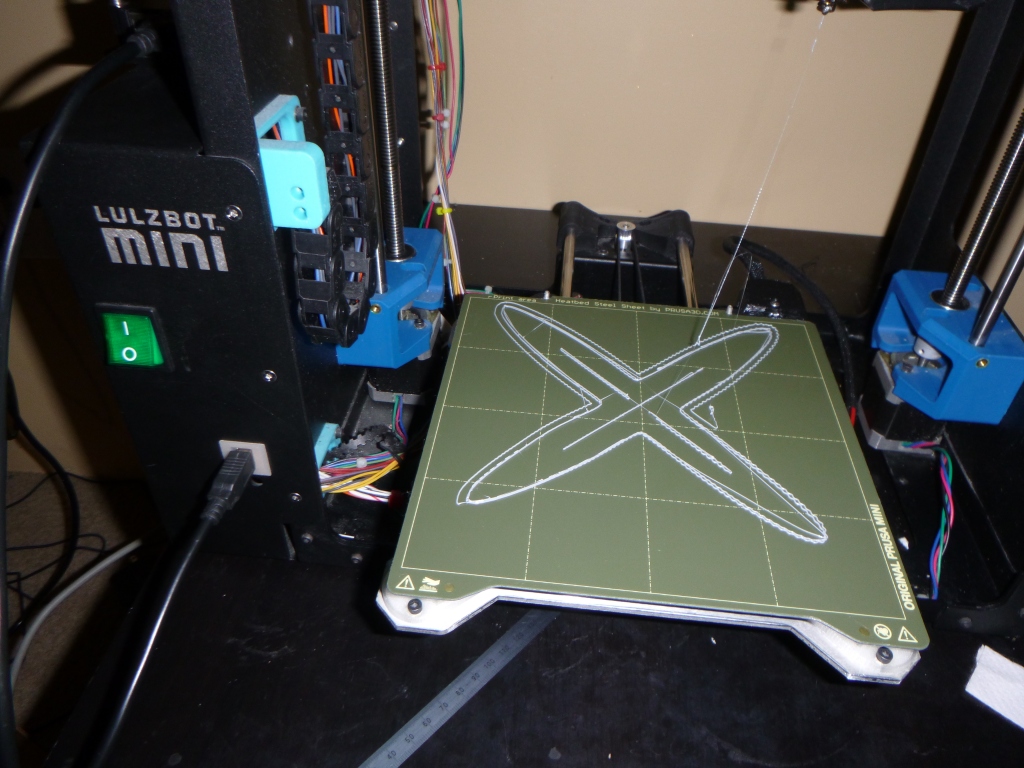
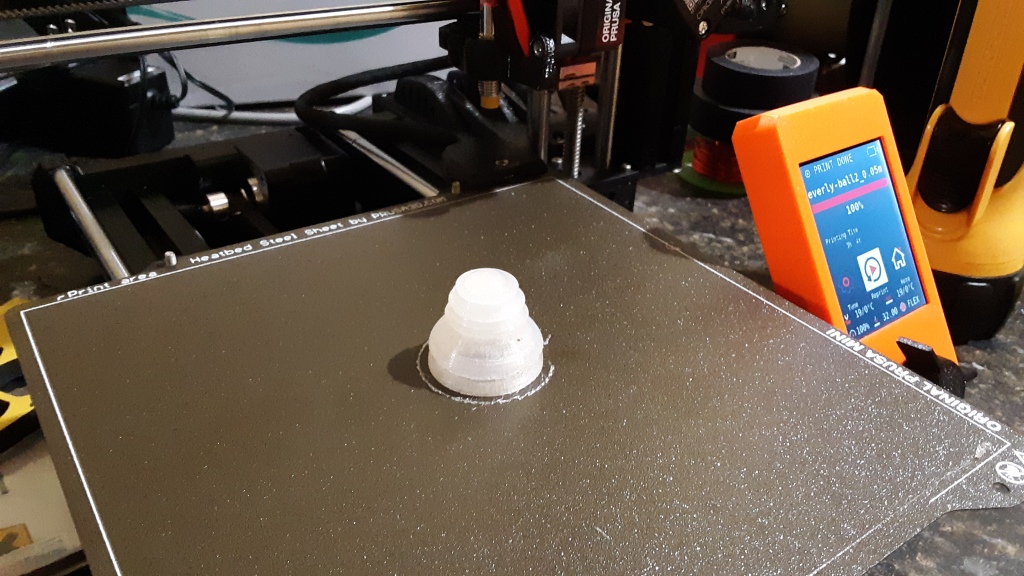
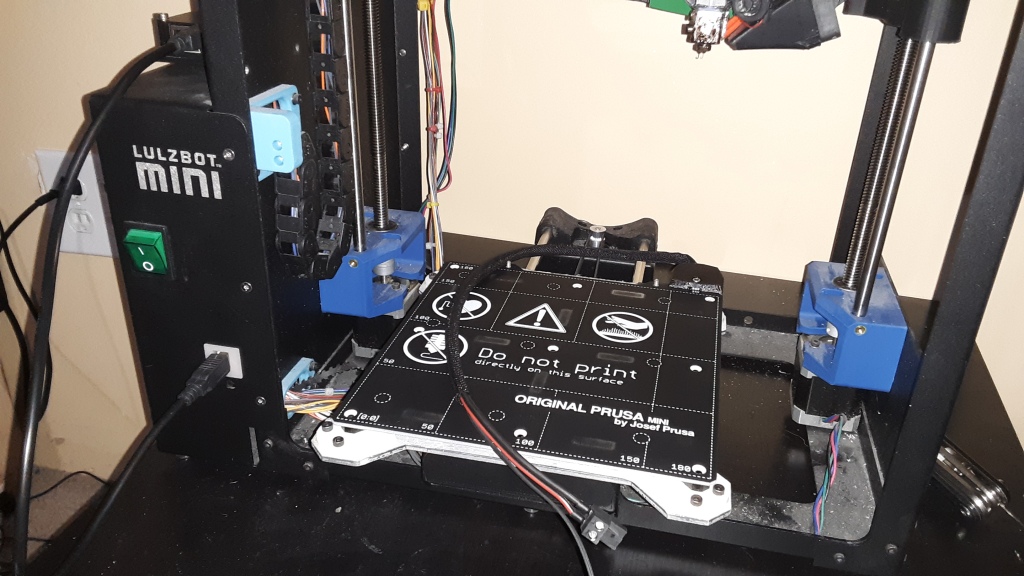
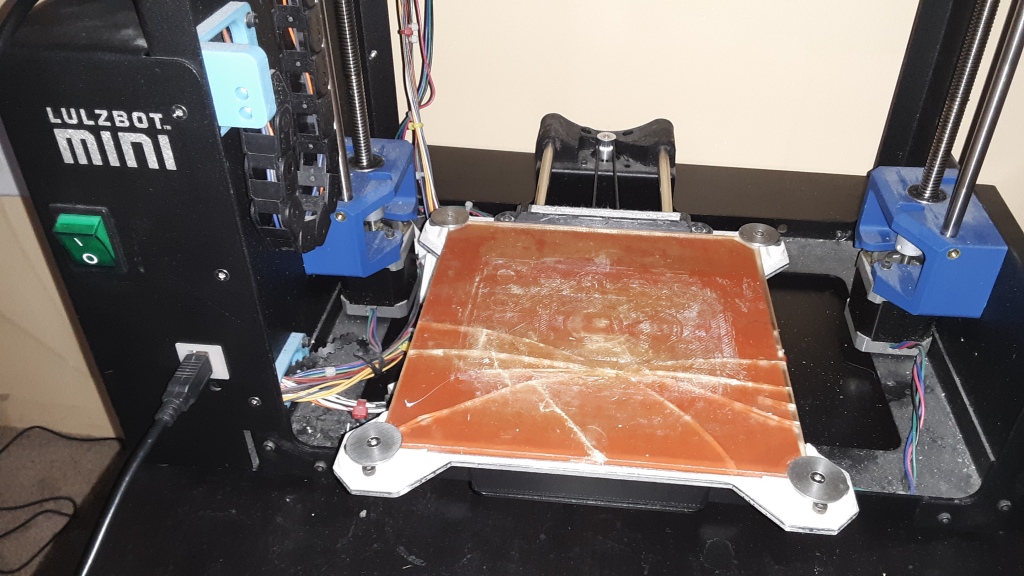
First test prints with Lulzbot mini / Prusa Mini Hybrid Mod. Print is obviously not centered on the new bed but my z-axis did not crash!
My top objectives are:
1. To get a Lulzbot Mini 1 modded (with minimal effort) to have a Prusa Mini removable bed plate system. Done!
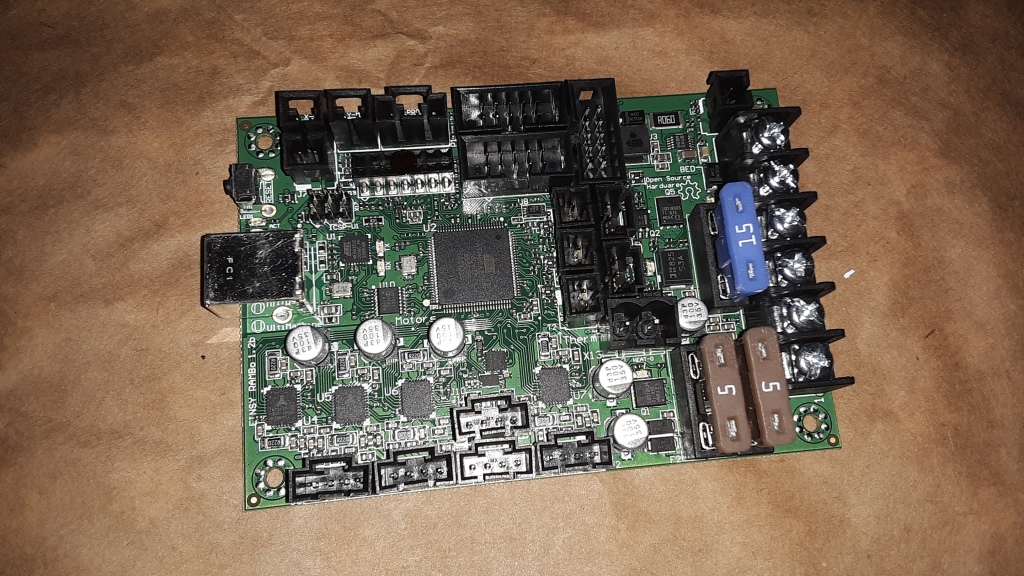
2. To continue to use the original stock Rambo Mini 1.1b electronics board, but with a new up-to-date (custom) marlin firmware. Done!
3. To be able to print like I did before with everything centered and adjusted to the correct height for printing on the new removable print bed. And to be able to print with the old Lulzbot Cura 21.08 or the newer PrusaSlicer. Done-ish, but needs tweaking!
Other future modifications may be: An upgrade to a newer Rambo Einsy with trinamic stepper drivers for ultra quiet use. Possible z-axis modifications to be more like a Lulzbot Mini 2. A new extruder design with possible automatic bed leveling sensor pinda probe. Add an LCD screen!
I was testing with the marlin 2.0 bugfix branch
The first major hurdle lately has been trying to update to Marlin 1.9 or Marlin 2.0 with the configuration settings to work correctly with the Lulzbot Mini. I got pretty far along when i decided i wanted to center my new prusa mini bed plate when a print begins.
I ran into a weird Marlin bug where the manual_y_home_pos setting would invert the y-axis stepper motor and crash the machine! I tried reporting the bug to the marlin code people, but no one would help. They just kept asking the same annoying question over and over whether I was testing with the bug fix branch, which i replied multiple times that i was.
The “fix” for this came from a helpful tip from my friend who suggested i use the “Drunken Octopus” Marlin fork which was originally being maintained by lulzbot before the awful situation where they nearly went bankrupt, fired over 100+ employees illegally, and eventually got bought out and moved to North Dakota. It worked, so I’m thinking it must come down to some overlooked configuration setting I must have missed??
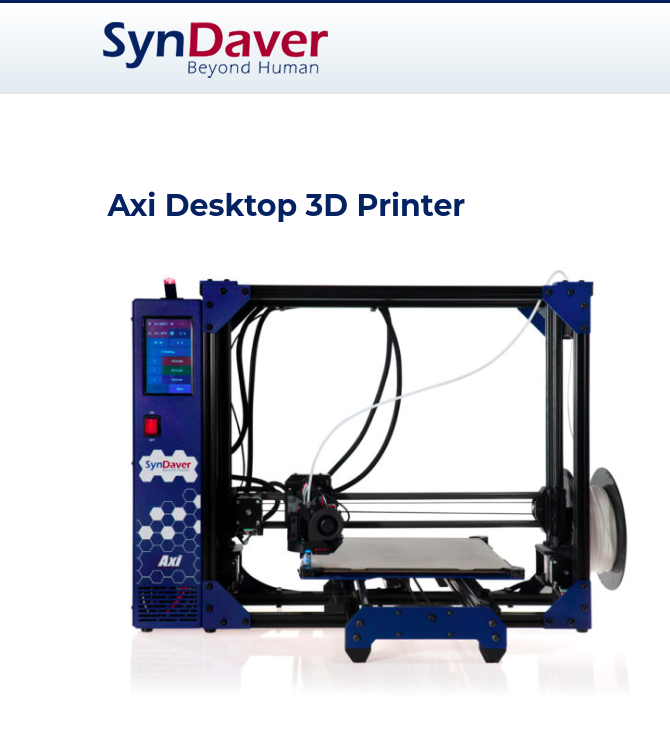
The Drunken Octopus fork is now maintained for lulzbot-type machines by that same former employee and is now also used for the new SynDaver Axi Desktop Printer which is a 70-80% clone of the Lulzbot Taz 6 / Pro series. The SynDaver Axi printer is not entirely open source being a hybrid of open source and proprietary, which is an interesting mix, but I don’t necessarily have a problem with that as long as the original source is available (which is).
In an ideal world I do think some licences like the new CERN-OHL-S Licence are what open source hardware and software should aspire to be. Basically the idea that if you use open source that the whole product from then on and forever will be open source. That would mean no mixing of open source and proprietary. But we do not live in an ideal world (yet). I personally think creative commons licences with non-commercial, no-derivatives, and other restrictive licences are insulting and are NOT true open source. I personally do not honor them because of their inherit hypocrisy. If you want to share your work with the world then do so in it’s entirety or don’t do so at all. I’m not the only one with this opinion, in fact the OSHWA says so as well.
Why aren’t non-commercial restrictions compatible with open source hardware?
There are a few reasons. If you place a non-commercial restriction on your hardware design, other people don’t have the same freedom to use the design in the ways that you can. That means, for example, that if you and someone else both release designs with non-commercial licenses, neither of you can make and sell hardware that builds on both of your designs. Rather than contributing to a commons of hardware designs for everyone to build on, you’re limiting others to a very narrow range of possible uses for your design. In particular, because making hardware invariably involves money, it’s very difficult to make use of a hardware design without involving some commercial activity. For example, say a group of friends wanted to get together and order ten copies of a hardware design – something that’s often much cheaper than each person ordering their own copy. If one person places the order and the others pay him back for their share, they’d probably be violating a non-commercial restriction. Or say someone wants to charge people to take a workshop in which they make and keep a copy of your hardware design – that’s also commercial activity. In general, there are just very few ways for someone to use a hardware design without involving some sort of commercial activity.
Good for SynDaver for swooping in and hiring a bunch of Lulzbot’s former abandoned employees, a hilarious move I must say. You can see why I no longer am supportive of Lulzbot as a company, and Jeff Moe in particular. Funny how Lulzbot created their own competition. Up to this point it was perfectly conceivable that a Chinese (or any) company could clone the Lulzbot series completely like they have the Prusa printers, but up to this point no one ever had.
Anyway, back to the modification project. Things are going well. I have successfully test printed a few times. At first the prints were not centered on the bed, but I finally figured that out. I now am testing manual mesh bed leveling code in the marlin firmware and despite not having an automatic bed leveling probe it seems I can get this to work without one. I have not yet enabled memory saving so as of now i need to level the bed every time I use it, and this slows the whole process down a lot. I probably will enable that next so i can use octoprint again and just click “send print to printer”.
Eventually I want to replace the extruder assembly with one that has a pinda probe. I’m actually thinking I may want to use a Prusa MK3S printhead to keep things compatible with my other build. Not sure whether i will need to make other mods to accommodate that or not. I will at the very least need a cable adapter. If / when I do that I will most likely swap out the Rambo Mini for the Rambo Einsy (that i bought from Ultimaker) for the trinamic drivers and LCD support.
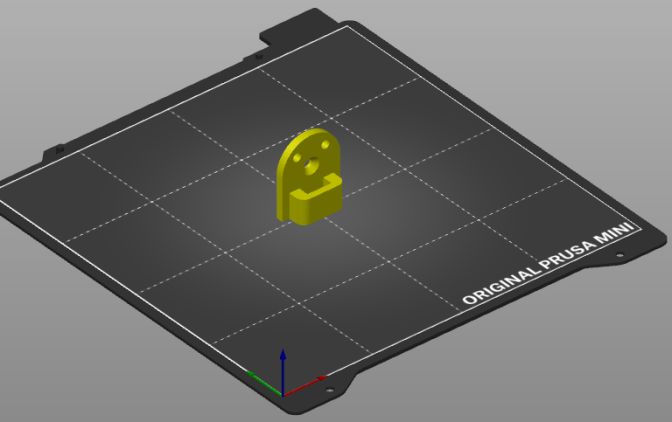
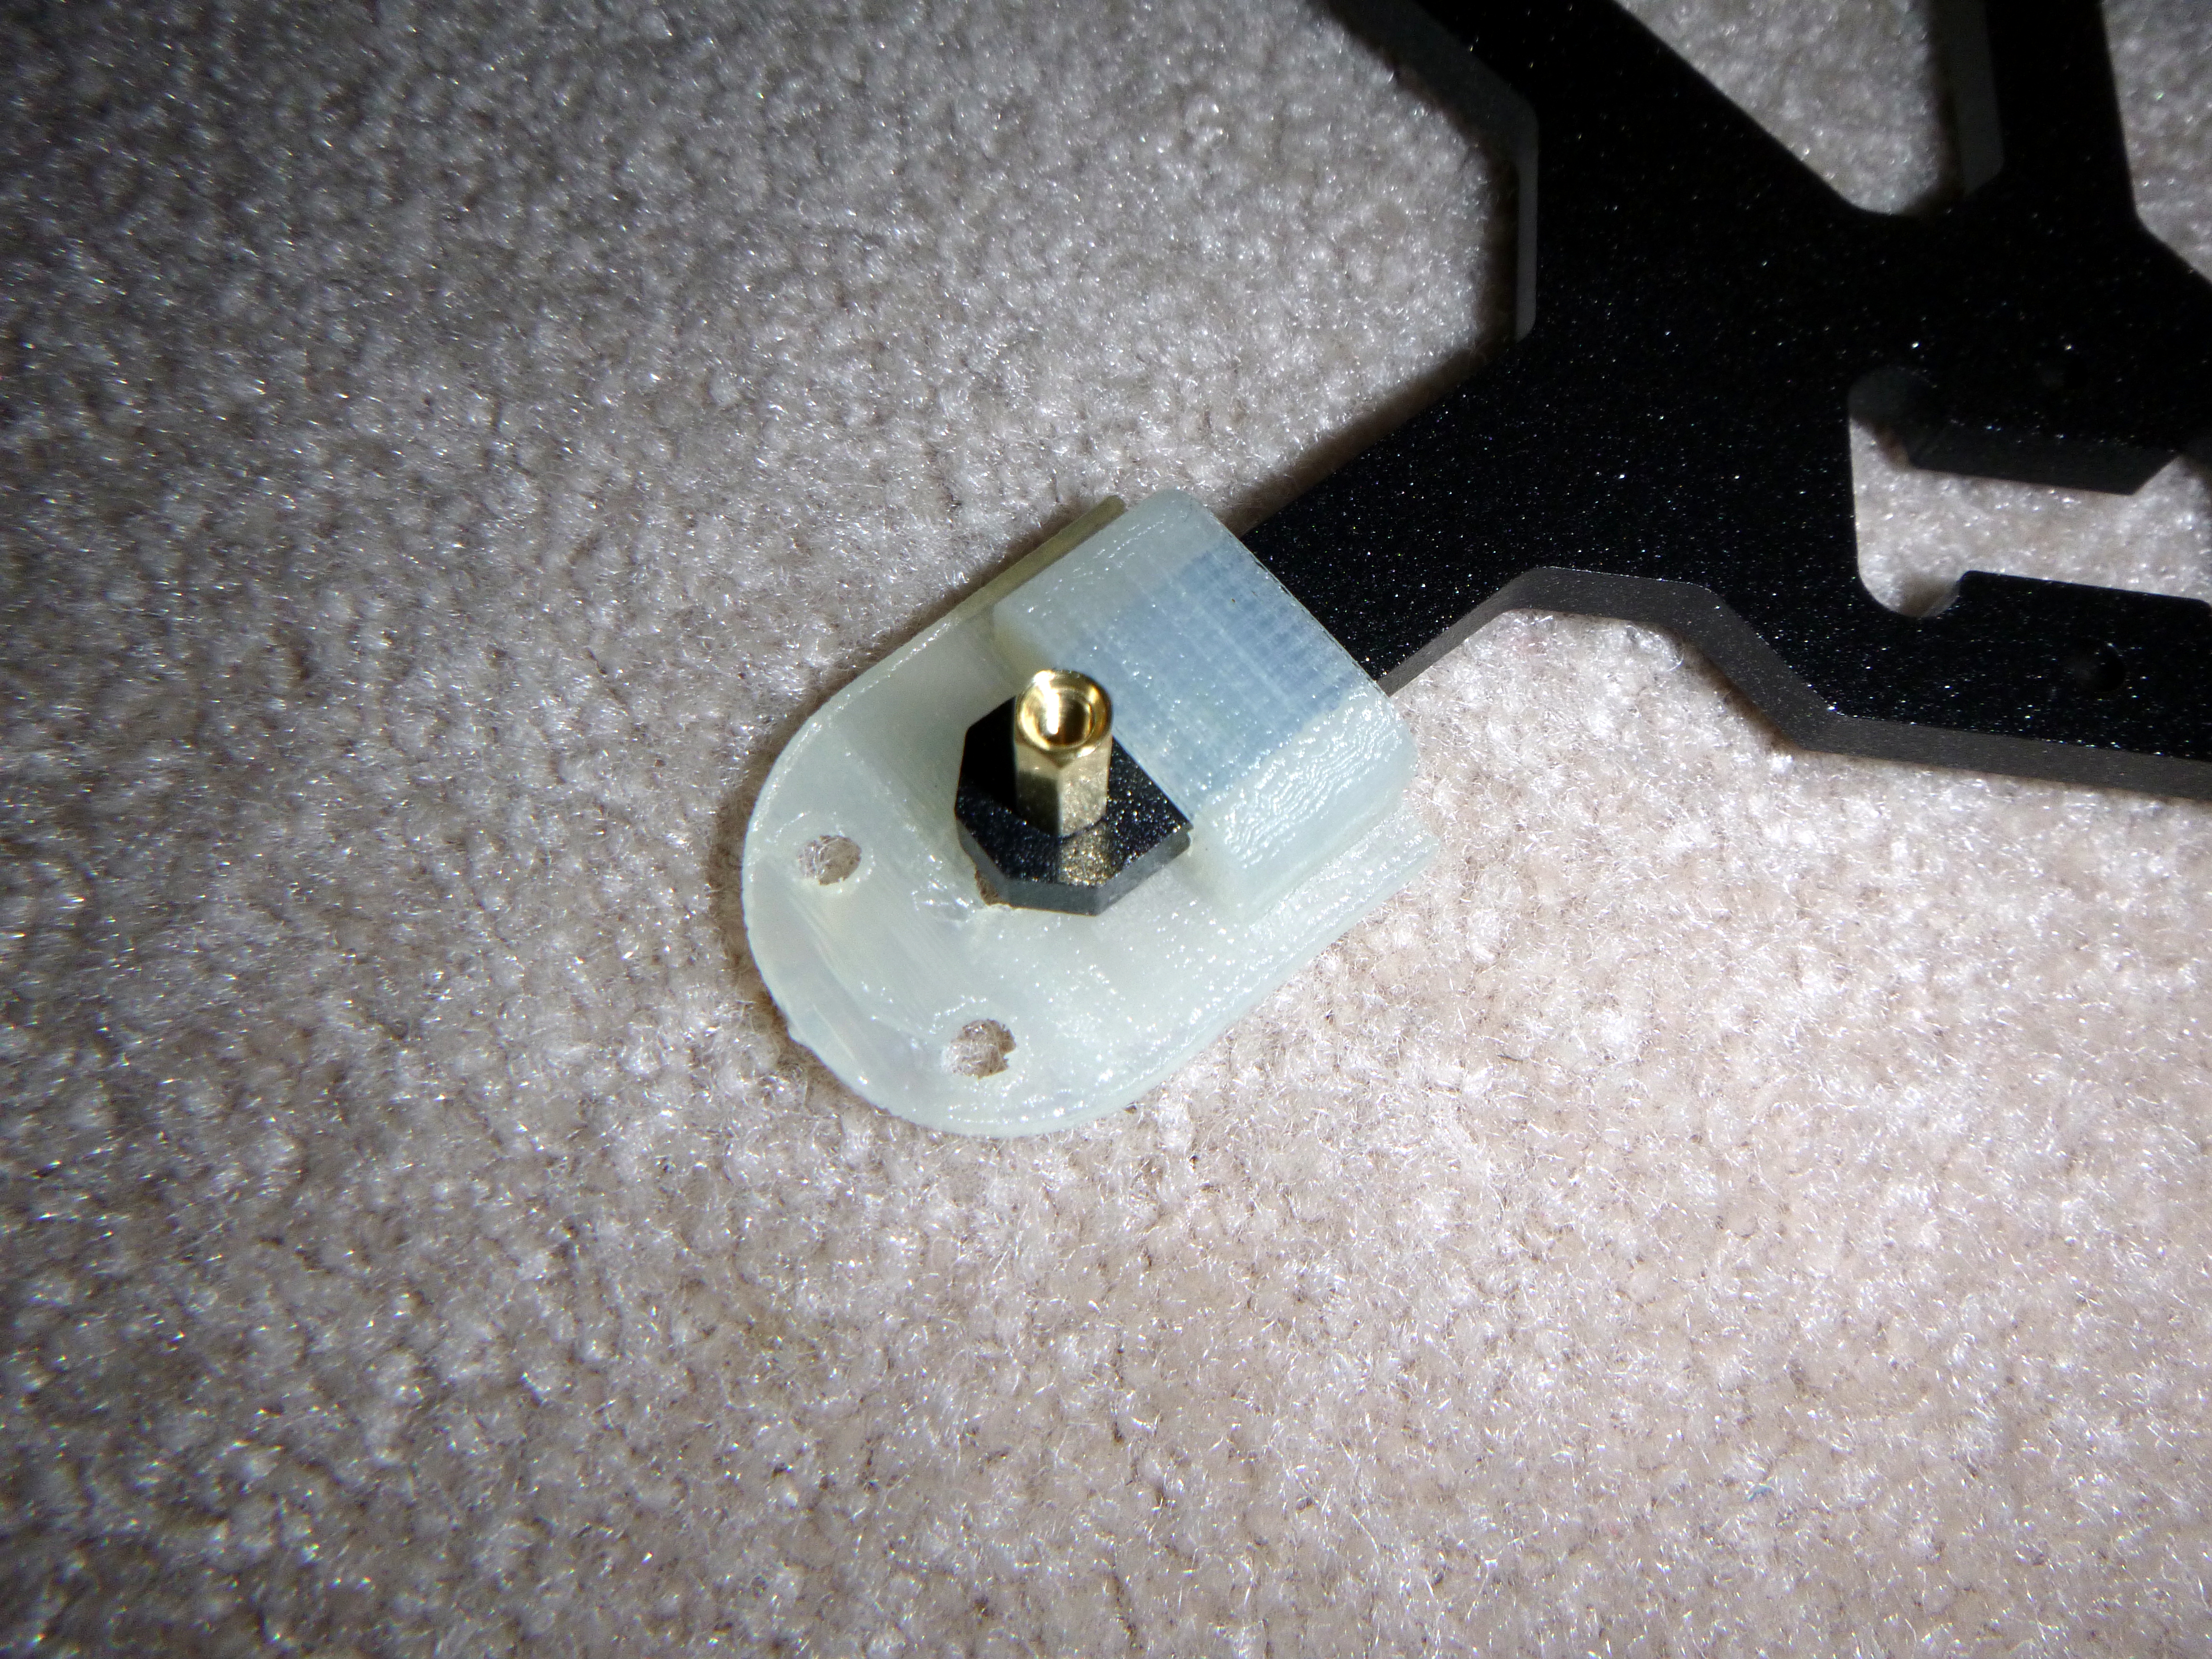
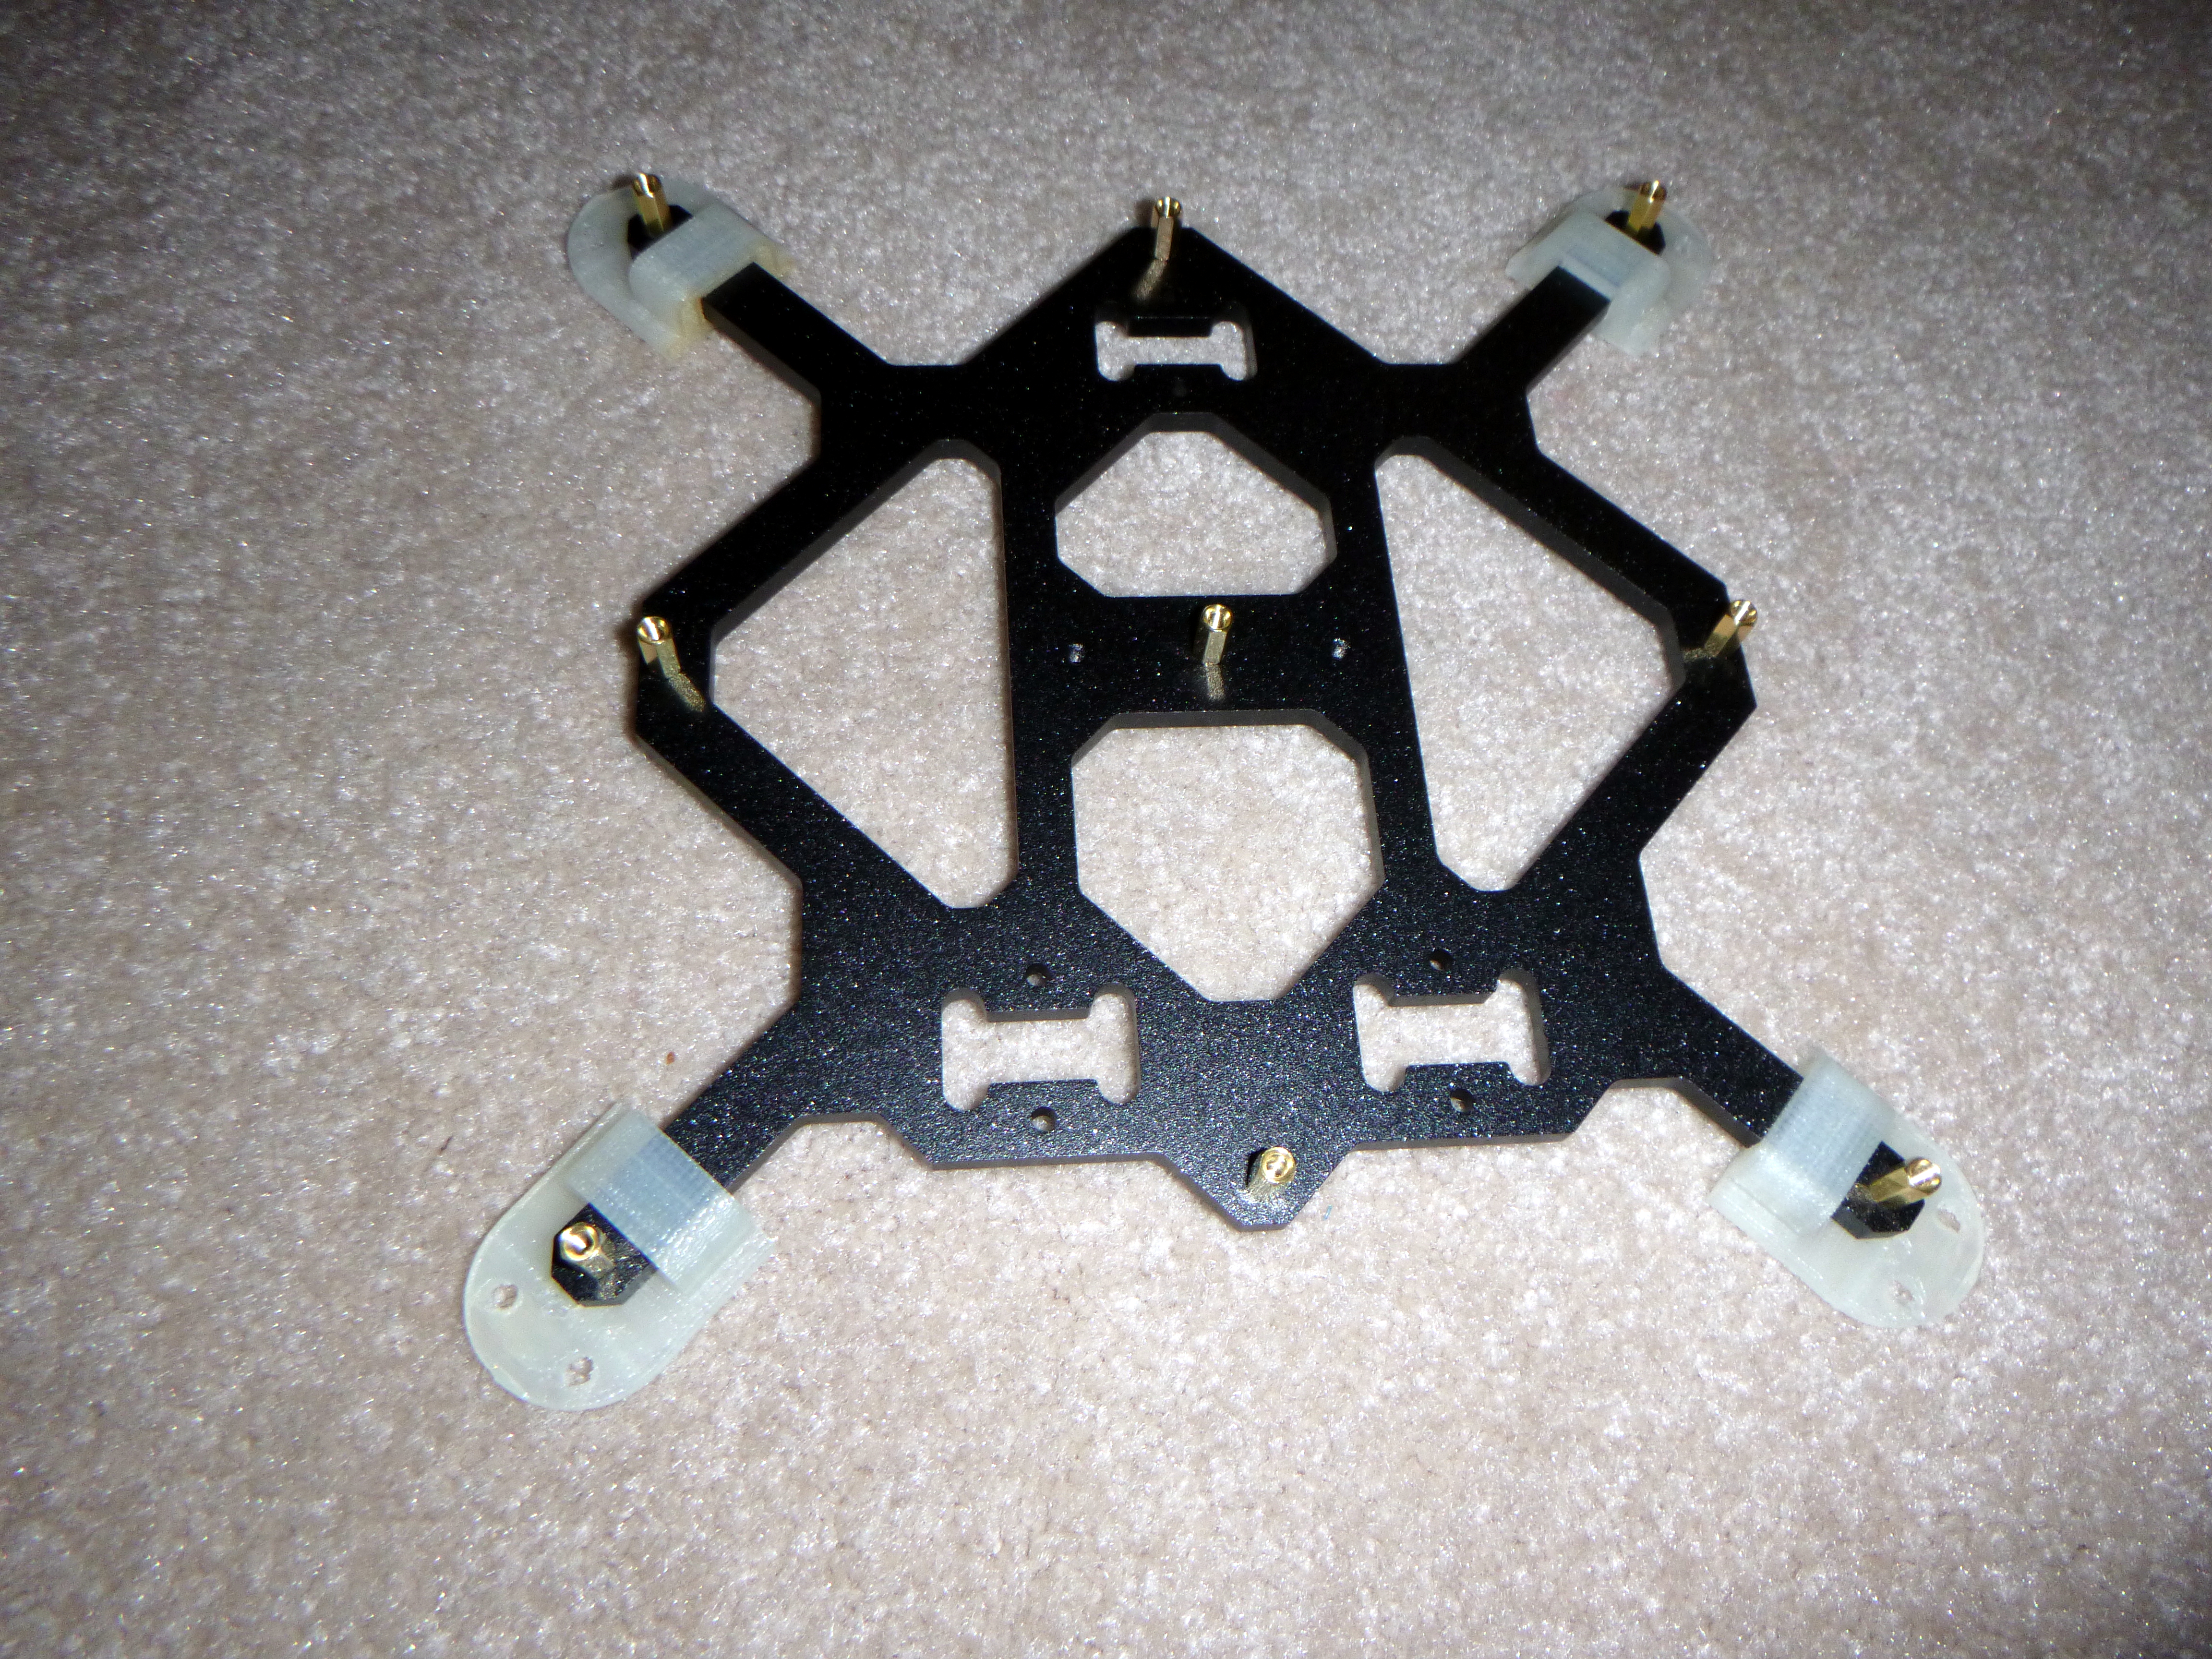
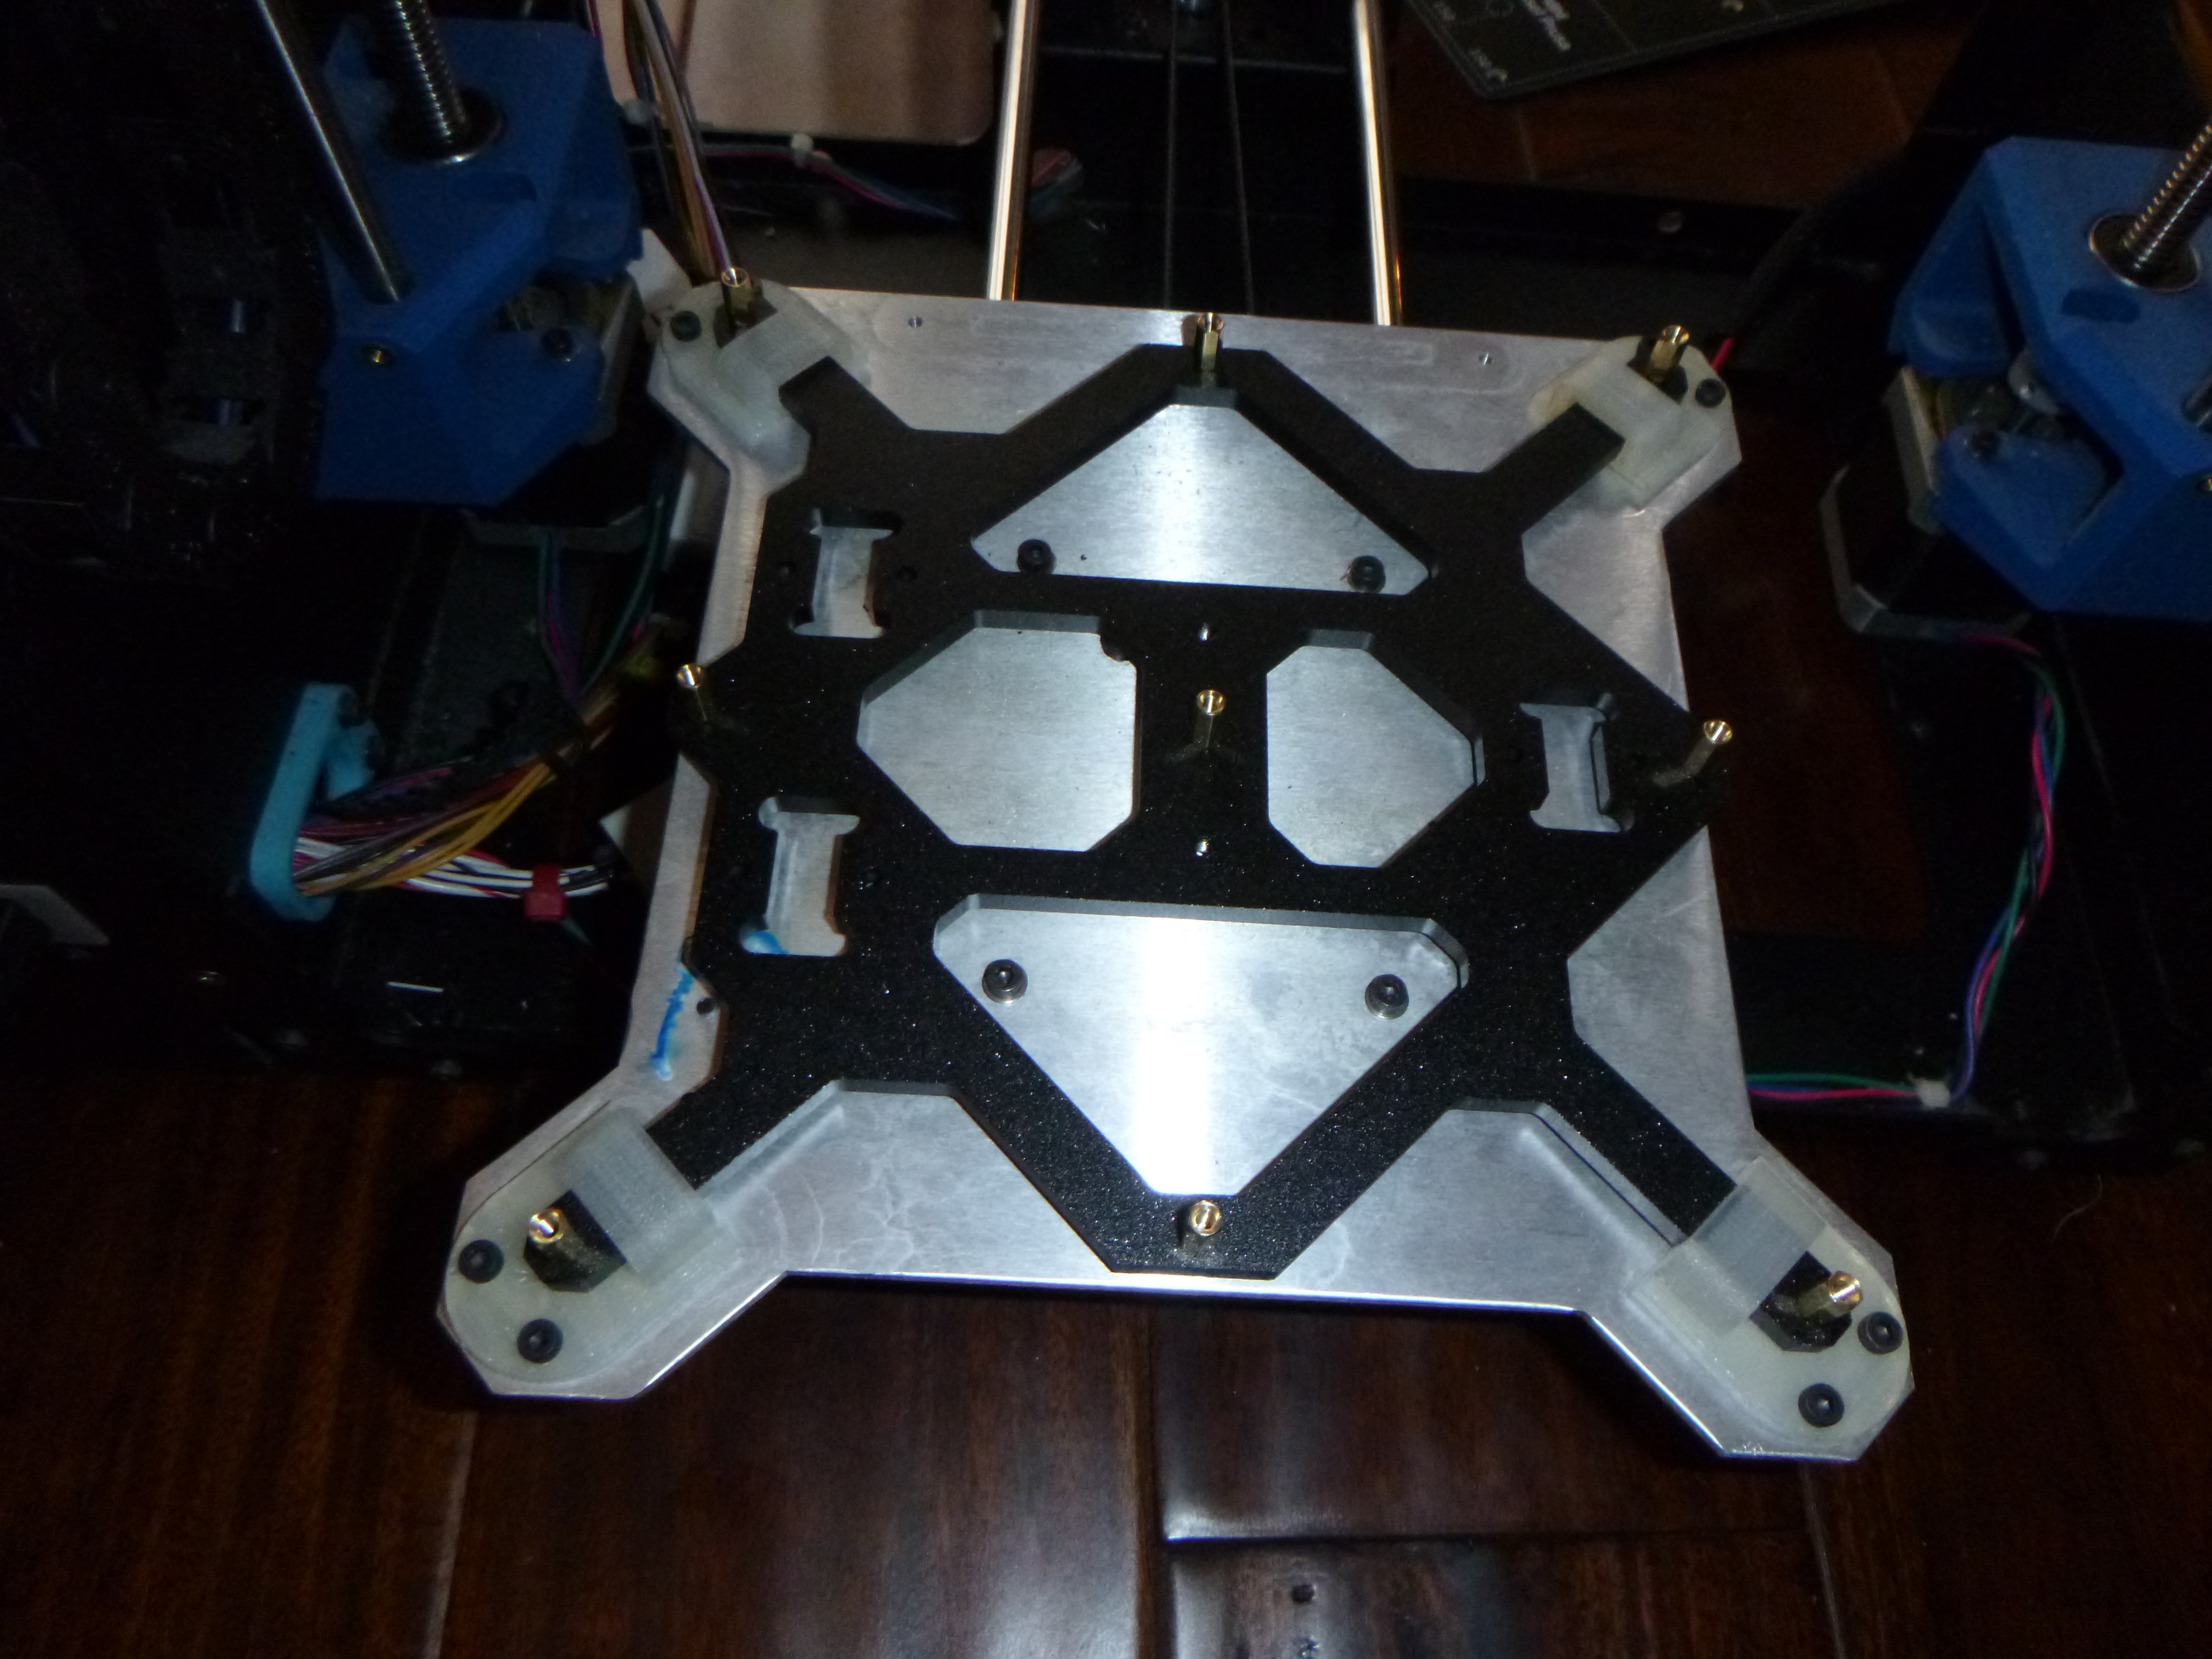
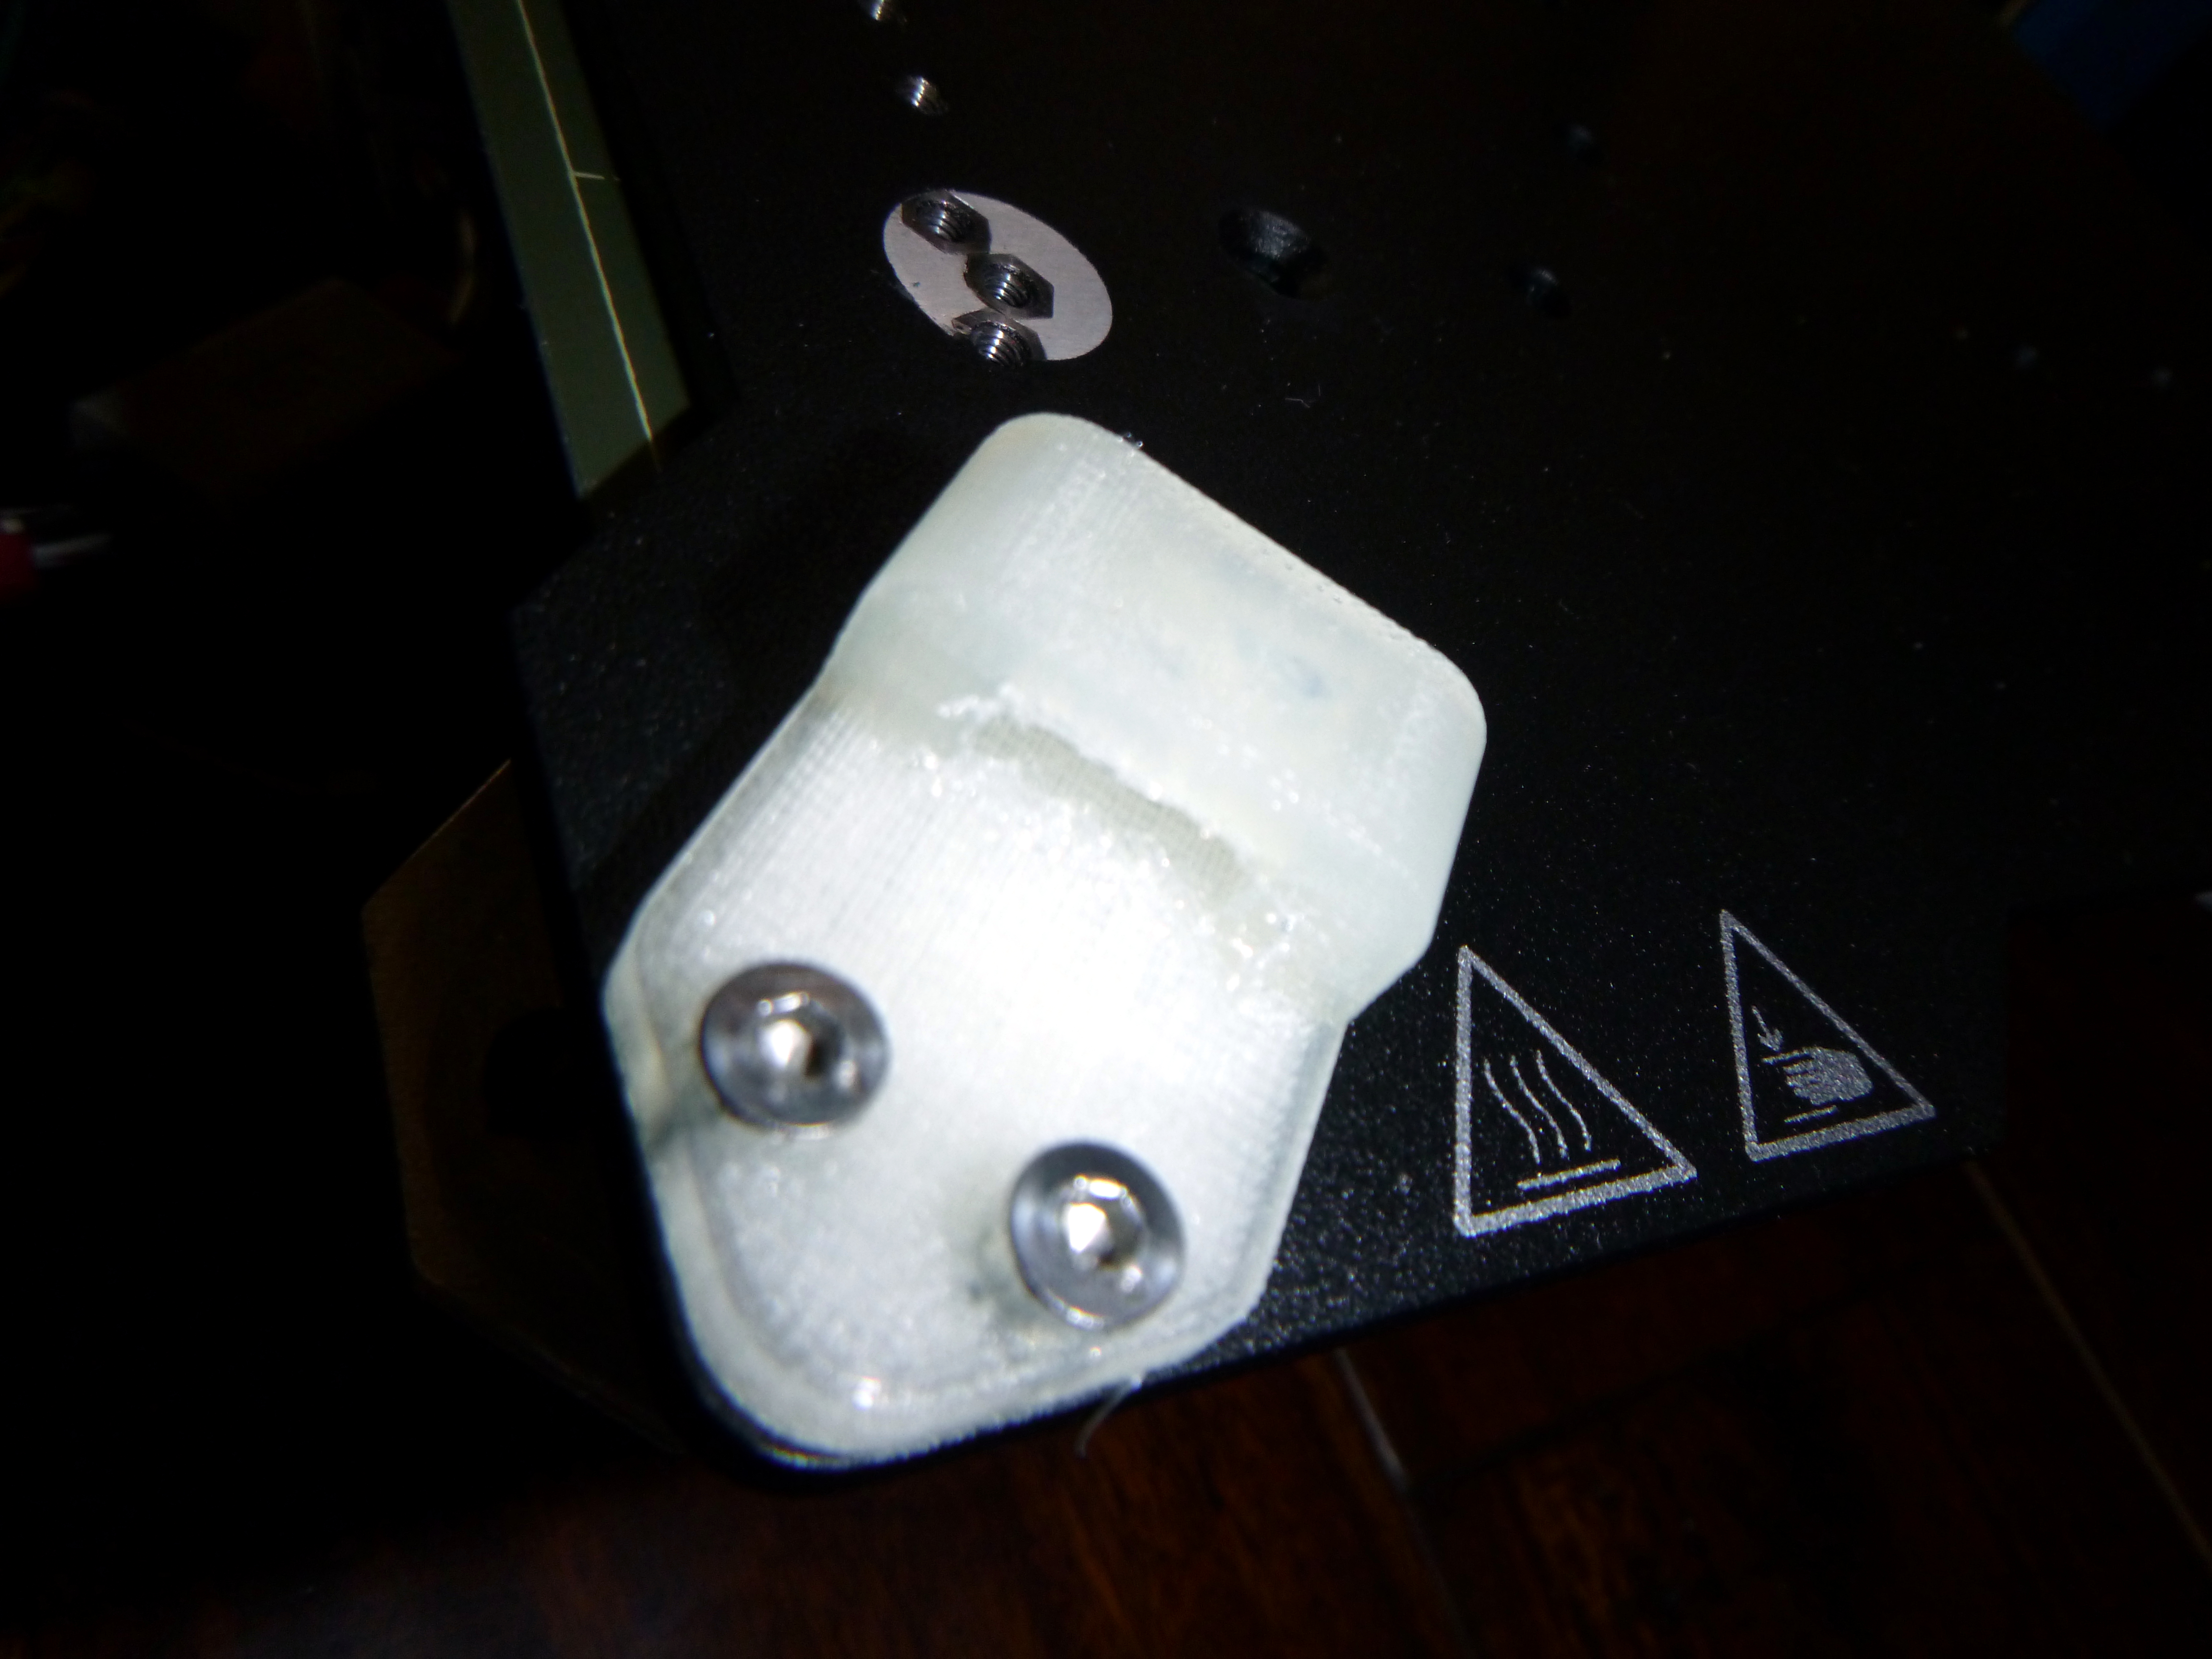
I came up with what I think is a pretty clever mounting system that still is fast, easy, and a complete drop-in replacement with no major modifications to either the prusa hardware or the lulzbot hardware. The only modifications needed were a small adapter for the heatbed cable and thermistor wires, and some countersunk holes on the bottom side of the prusa mini bed plate. The rest were 4 3D-printed ninjaflex corner mounts that hold things together quite well. I have posted the files on Thingiverse & soon to YouMagine.
I am happy with how this mod has been turning out. I have tried to do it step by step with as few mini mods as possible so that it could perhaps be done by anyone, with any version of a Lulzbot Mini (1 or 2). I have tried not to stack the mods so that if one person wanted to repeat my process and only do just the bed replacement on a really old Lulzbot Mini 1 without changing the electronics or the extruder print head then that would work. On the other hand if someone wanted to do this on a Lulzbot Mini 2 or in combinations with other mods, those could probably work fine too. The firmware does need to be replaced regardless though as the bed height is higher than the old one and no bed leveling probe is currently installed so major z-axis crashing would occur.
I at least have a fairly up to date version of Marlin working decently well now. It uses the Drunken Octopus fork and is fairly up to date with Marlin 2.0 and other upstream changes. So in many ways this firmware is an upgrade to what was on my mini before I started and can only improve. I want to double check motor settings for speeds and feedrates to make sure I have things optimized as best I can. But otherwise it seems to be working well with a properly tuned slicer.
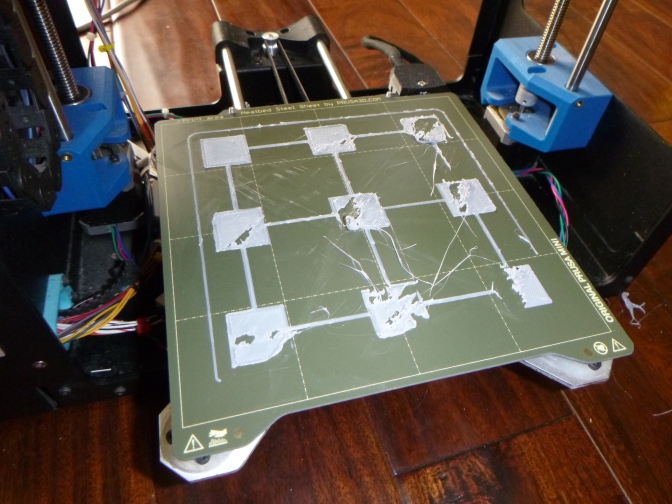
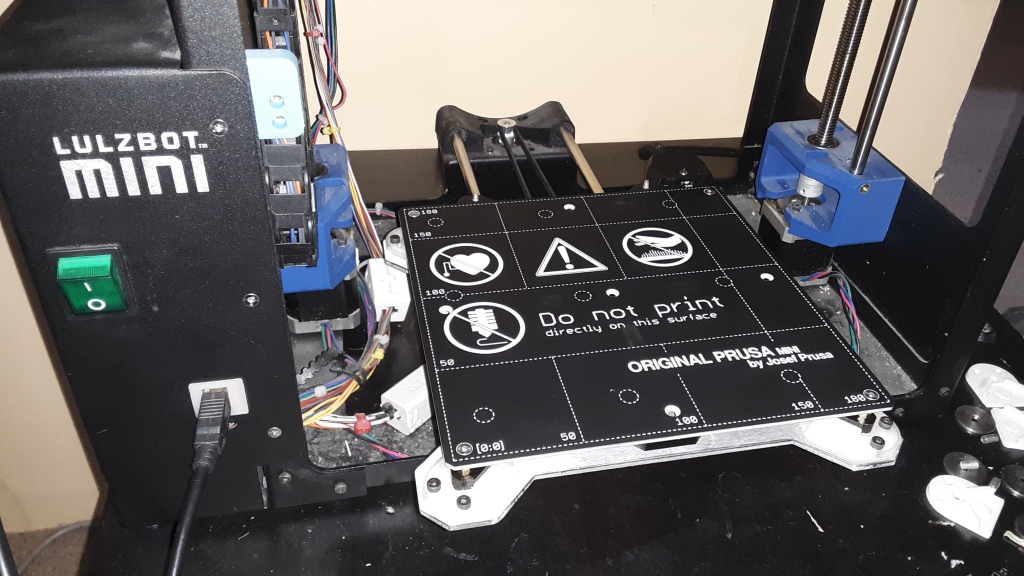
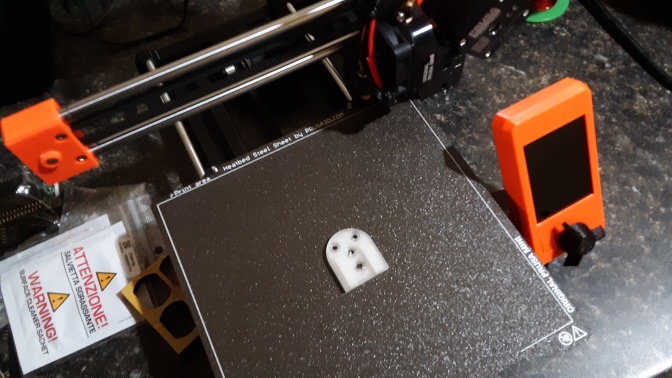
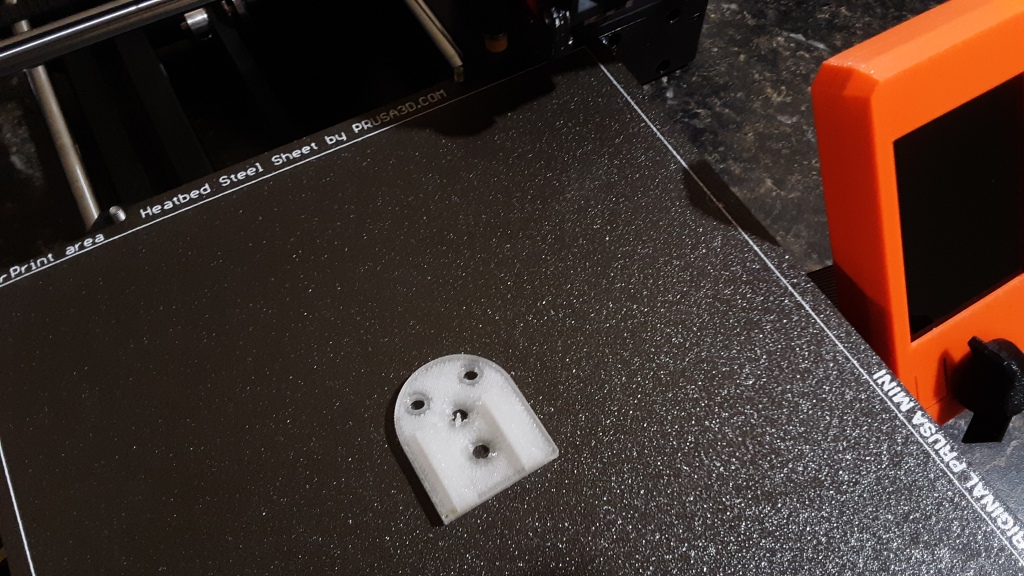
A bad print before manual mesh bed leveling was attempted.
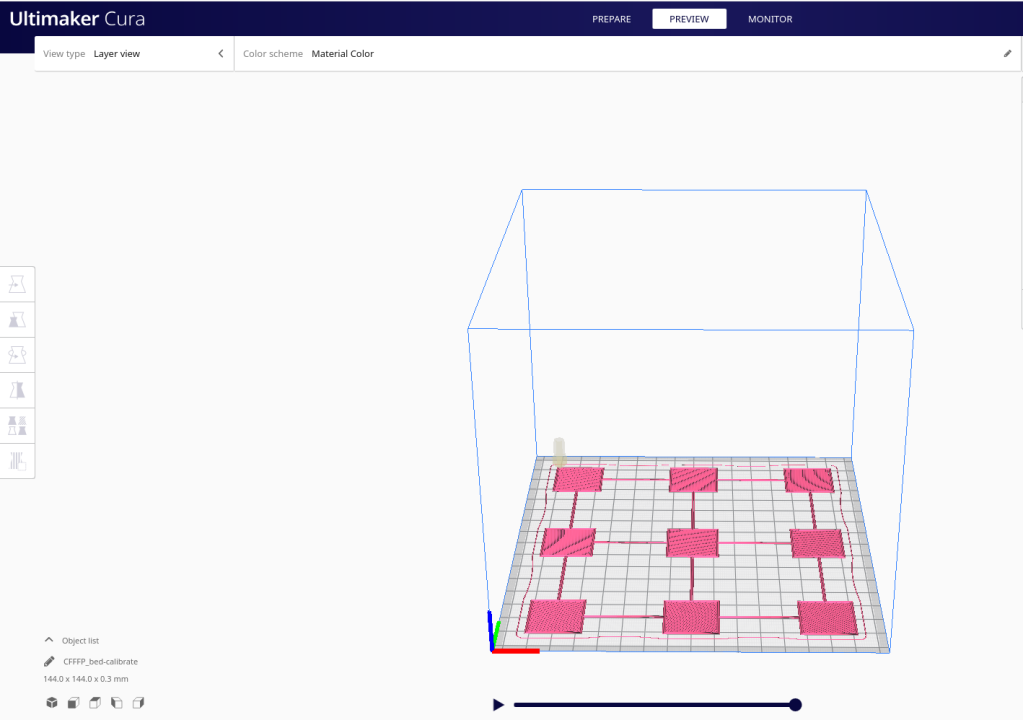
I have also officially abandoned the Lulzbot Cura 21.08 slicer. I was using the old Lulzbot Cura 21.08 instead of the newer Lulzbot Cura 2 because the older software just ran so quick compared to the new one and frankly I thought the new one sucked and looked like crap. I still do if i’m honest. But since I no longer have a stock Lulzbot machine anyway I figured I would give the newest version of the Ultimaker Cura a try. I was pleasantly surprised!
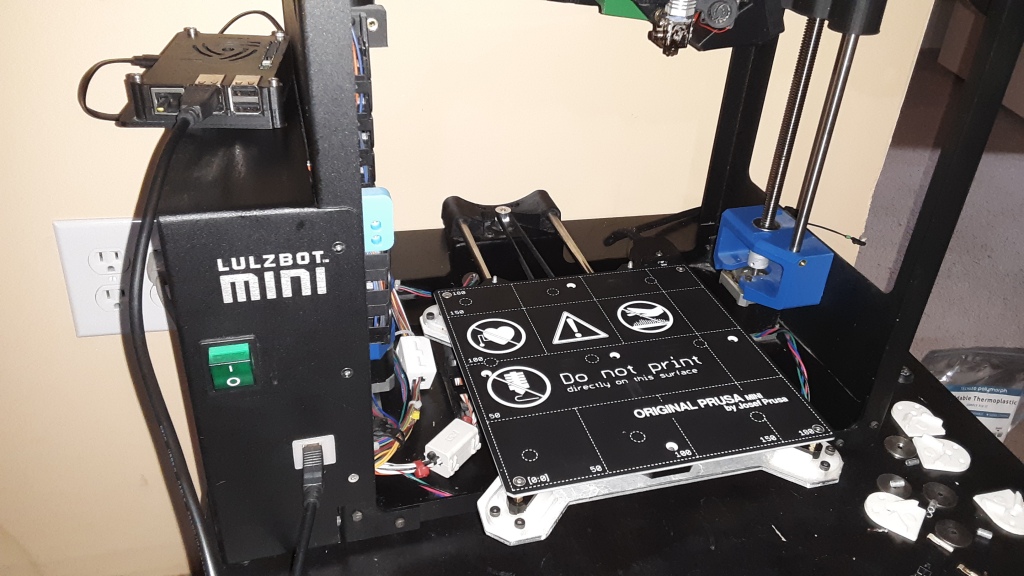
A better print after manual mesh bed leveling. I accidentally bumped the raspberry pi running octoprint, so that is why the print is only half finished.
Not only is the Ultimaker Cura more up to date and more polished than the Lulzbot fork, it comes in a better Linux package than the Lulzbot version that is not up to date with needed dependencies on my newer PopOS 20.04 laptop. So I literally could not even install the Lulzbot skinned version of Cura 2 on my Linux machine. Once I set up a custom printer in Ultimaker Cura I was pleased to find it worked great! It even made the motors twice as quiet! I tinkered around with trying to use PrusaSlicer to slice and control the lulzbot mini, but i have not figured out the best settings for the motors quite yet. I got it to work once, then it reverted to it’s default motor settings and sounded terrible. Since Ultimaker’s Cura worked flawlessly with no motor adjustments and the motors were so quiet compared to the old Lulzbot Cura 21.08 and PrusaSlicer (for now), I will be using Ultimaker’s Cura until I am ready to tinker with PrusaSlicer again.
It looks like I haven’t posted anything new here in awhile.
To be honest, other than this update, I might not for awhile more as 2020 and 2021 has been pretty crazy and busy. Lots of life changes in such a short time, and just not enough time to do them all. In some ways this blog seems a little old as well, though I’m proud there are enough new-ish posts on it as much as they are. While in some ways I feel like phasing this blog out, I don’t know that I will abandon it completely. Maybe this blog will contain most of my incomplete projects or crazy ideas.
Anyway, for those of you who follow my blog but don’t yet know, I’ve officially retired my first website Biolumo.com, and have replaced it with RabbitMountainResearch. Rabbit Mountain is one of my favorite hiking spots here in Northern Colorado, and for once it seemed like a good fit for me as a business name / potential farm identity. I’ve had the new website up for a year now I think. It is still a testbed and experiment of sorts, but I finally feel like it is moving in the right direction.
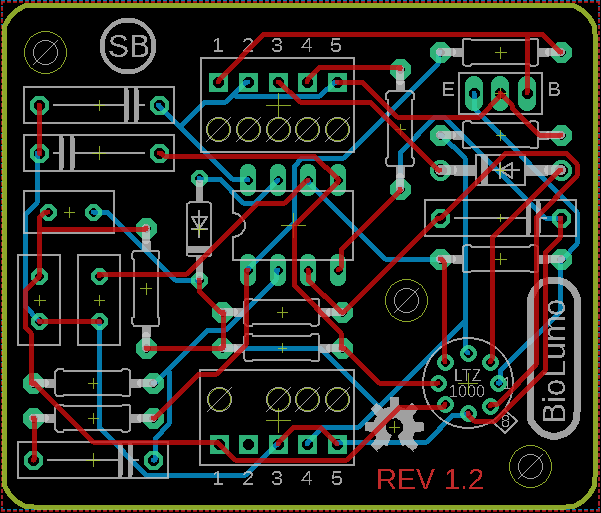
I’m getting back into electronics a bit lately and have improved my Eagle CAD design skills. Since working at Colorado State University for a brief time I was able to pick up new SMD or surface mount skills that I’ve been able to carry forward.
I’ve been playing around with the idea of trying to use my skills to design and sell unique Open Source Hardware electronics. Up until now I didn’t have anything useful or unique enough (or working) that seemed to qualify. But two designs I’ve come up with I think might work.
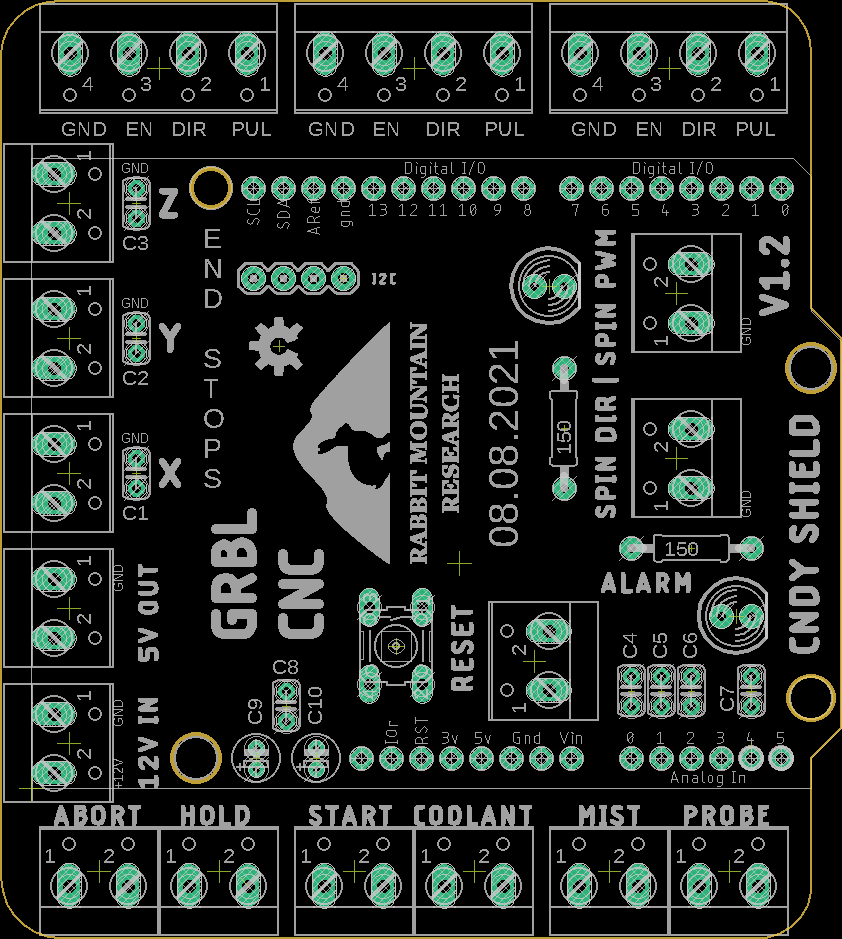
The first product is for DIY CNC machines. I’m wanting to get into building my own CNC router or CNC milling machine soon, and have a small engraving one to tinker with, so this was the perfect one to start with. This design is based on the INDY shield from Nikodeem Bartnik. He has some really cool videos on youtube. I’m calling my version the CNDY shield as I wanted the name to be similar to reflect it’s roots.
I’ve put together 10 kits to start with and will be attempting to sell them soon on Tindie. If they sell well I plan to make more, and hopefully any profits can help me to design and sell even more OSHW electronics!
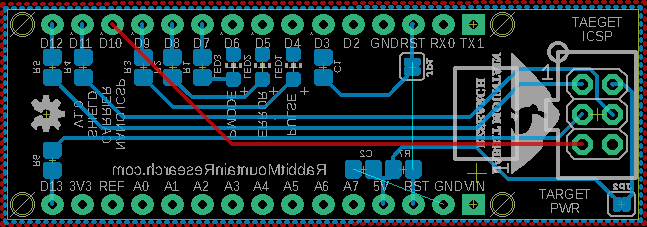
The second product I hope to release is a simple AVR ISP programmer carrier board for the Arduino Nano. I’ve needed a new replacement for my old Adafruit TinyISP programmer for awhile now. I need an ISP programmer to fix the various arduinos I have with corrupt bootloaders, and potential future embedded SMD projects. But the TinyISP programmer does not work out of the box on modern Ubuntu Linux or with the Arduino IDE. And quite honestly I’m to the point where I want all my devices to be USB-C, or at least USB-micro. The TinyISP uses the old legacy USB type-B printer port. It works, but this is 2021! We need to start moving to USB-C everything in my opinion.
Anyway, that’s it for now. Check out my new website, give me any feedback on it, and look for my designs to posted on Tindie this week or next week I hope! Soon I plan to start a facebook page and an instagram for those of you that are into that.
Let me know if any of this interests you or whether you even still follow my blog!
Today I am writing to let you know that in tribute to my old blog post about helping my dad clone a board for the HP / Agilent / Keysight 3458A multimeter that I have decided to make it open source. There is no licence, it’s public domain. Do what you will with it. Hopefully someone finds it useful.
Today i finally had some time to try and get my Lulzbot-Mini Prusa Hybrid bed working. I made some adapter cables to connect the Prusa Mini heat bed to my Lulzbot Mini electronics. They work great. The bed heats up very fast, probably better than the original Lulzbot heat mat. And it has a really awesome red indicator LED to let you know when it is heating. Really Cool!
Making good progress on it. Decided that with removing the bed levelling washers i needed to flash custom marlin firmware. I grabbed Marlin 2.0 and got nearly everything configured and even got a test print (although it needs some tuning). The problems arose when i tried to follow this guide to center the print on the new print bed. https://www.youtube.com/watch?v=Dqt8cUtzOfs
When i went to uncomment the //#define MANUAL_X_HOME_POS & the //#define MANUAL_Y_HOME_POS i ran into really weird problems. I was able to get the x-axis to center although instead of being a negative value it was positive. But when i went to put in the values for Y i got some weird grinding sounds as if the stepper motor was running the wrong way. I tried switching the y value to the opposite since the y axis is flipped, but either way it does not work. Additionally when inputting a G00 X90 command sometimes the Y-Axis will move too! This should not be happening! And only seems to cause issues when the #define MANUAL_Y_HOME_POS is uncommented. I’m wondering if i encountered a weird bug in Marlin 2.0. Some have suggested that Marlin 1.1.9.1 is more stable.
Anyway, any suggestions? Comments on my project? This is the first time i have dug into marlin on my own.
At the moment i am choosing to get it working with minimal changes to the electronics including using the original Rambo Mini 1.1b. Eventually i will change it to the the new Rambo Einsy board with a pinda probe an LCD screen. But i want it to work as is to start.
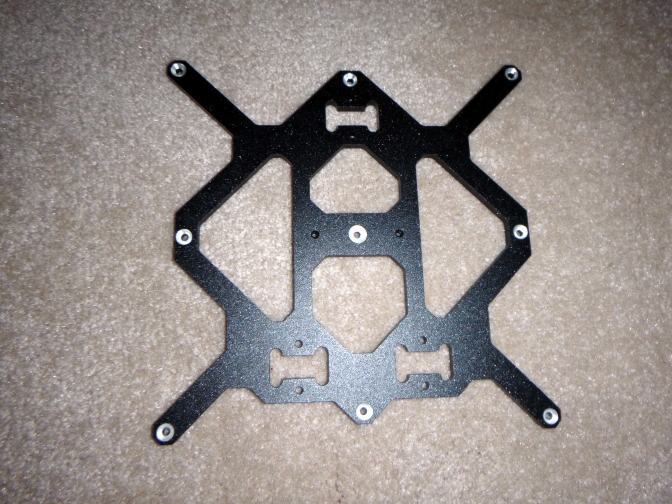
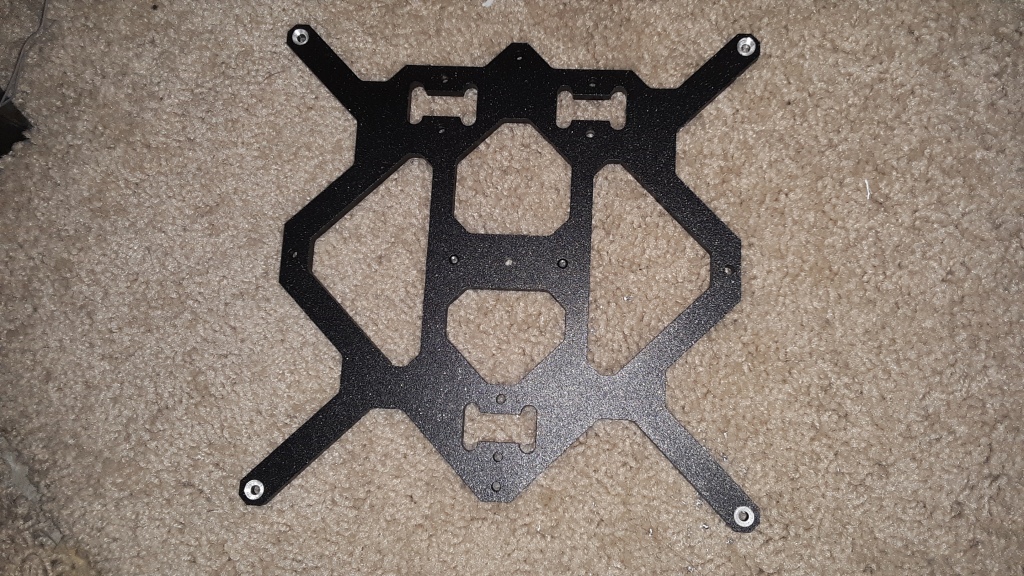
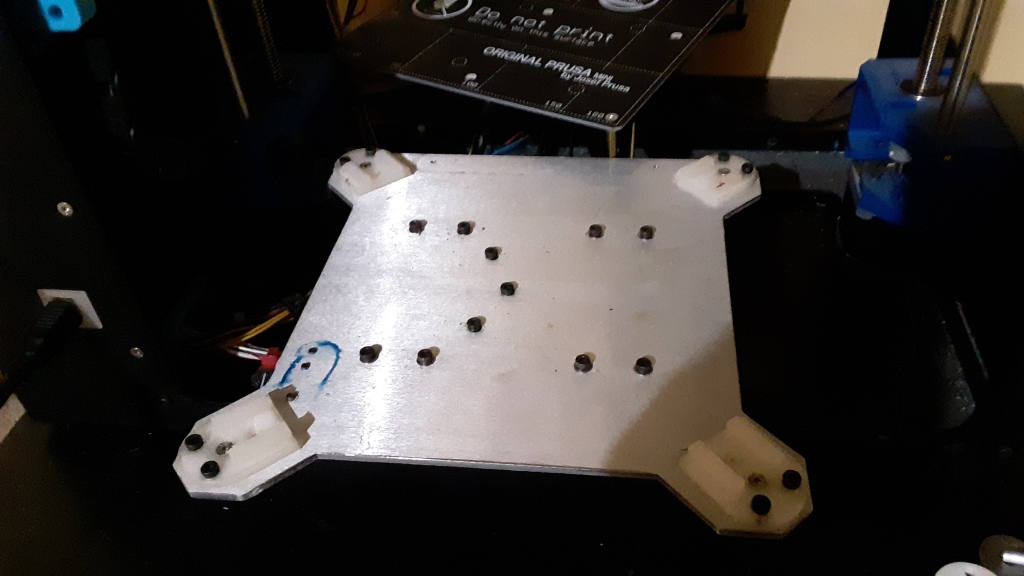
The flexible metal build plate mod for my old scratch-built lulzbot mini 1 is well underway. I had to order some countersunk metric screws and binding posts from Amazon. I also had to countersink a few holes on the bottom for this to fit together flush like i want it to. Other than that though there has not been much modding at all really. I do still have to mesh the wires together or replace some connectors, but i expect that to be very minor.
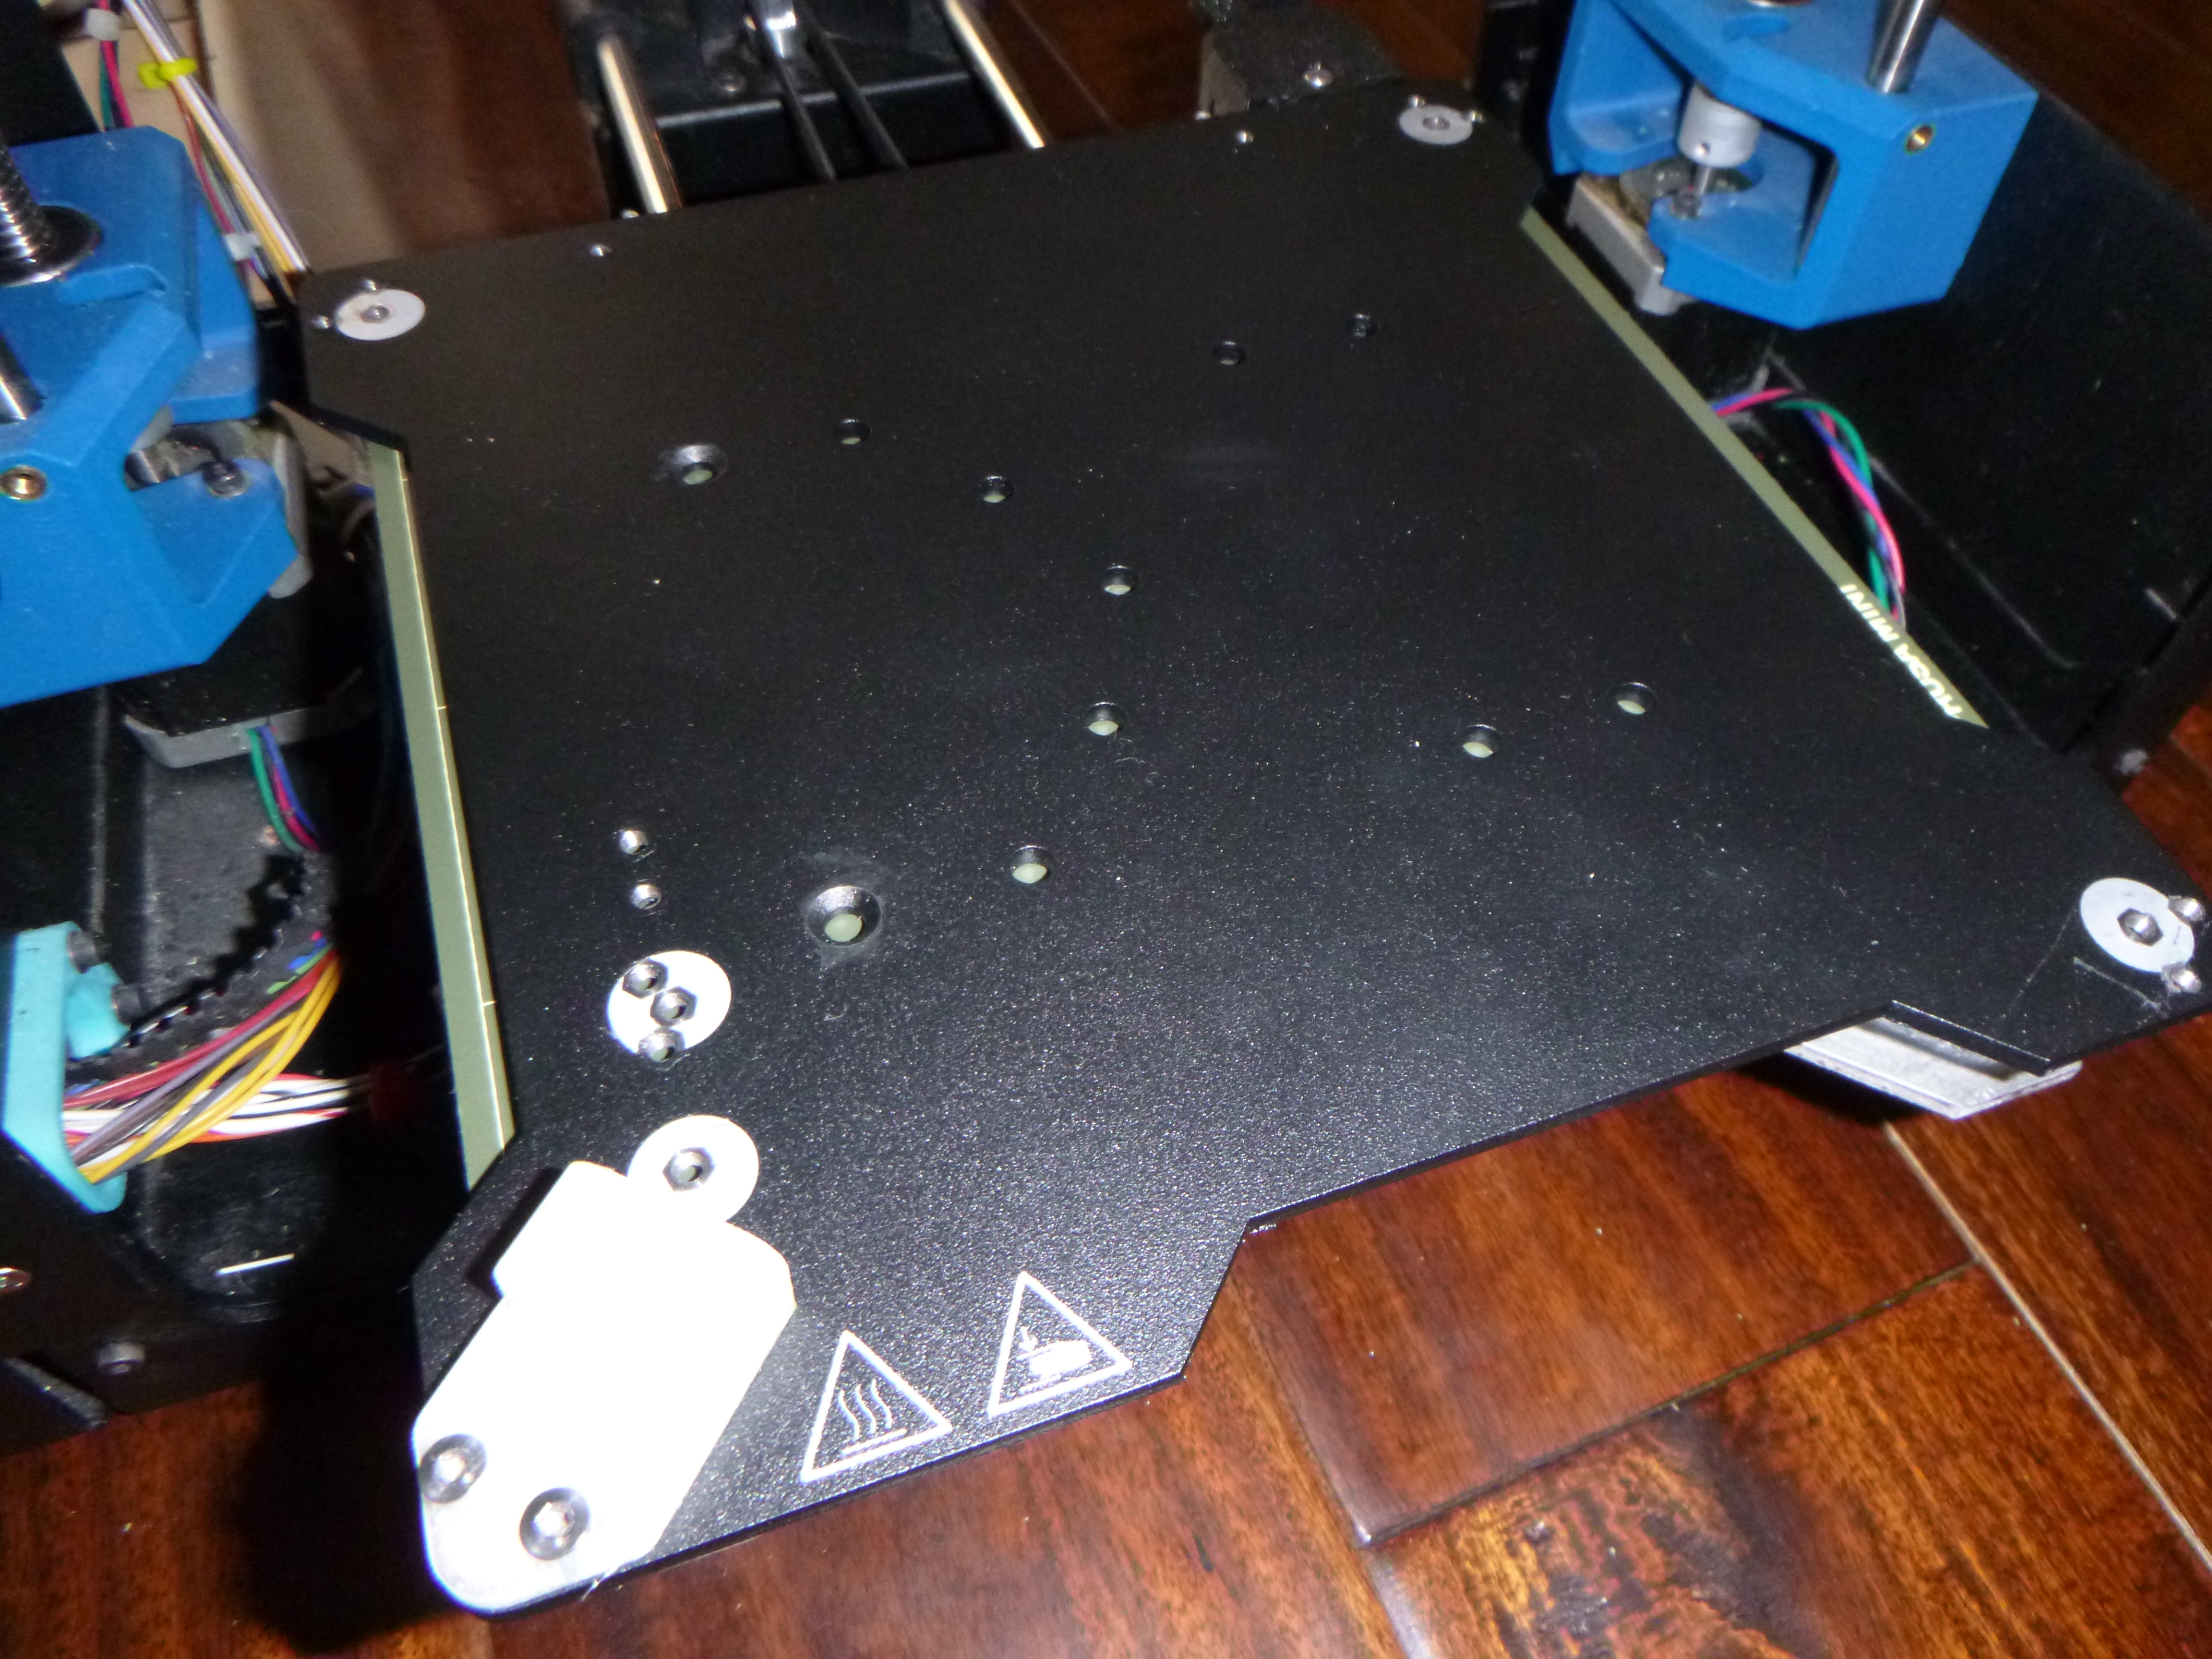
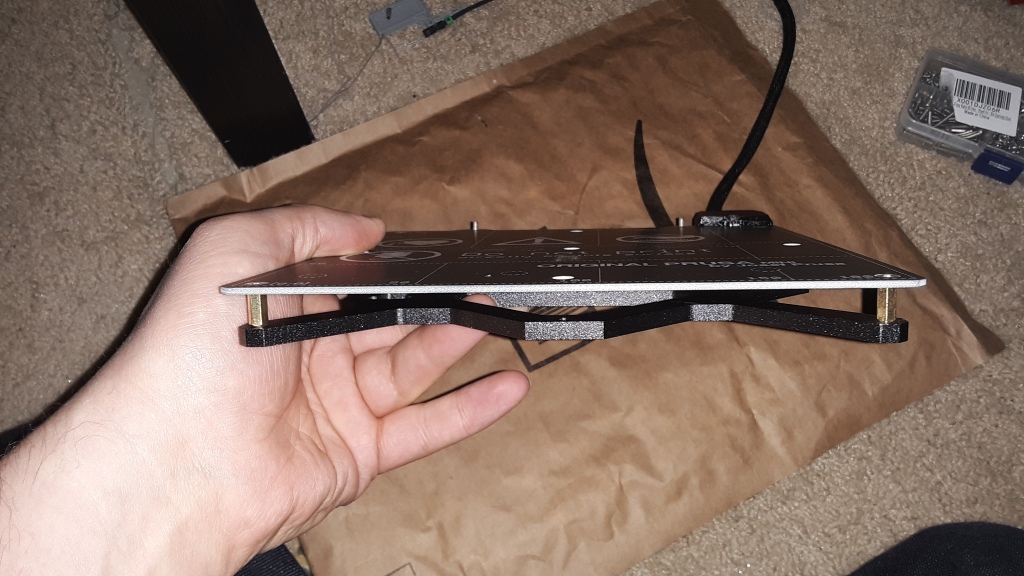
Prusa Mini heat bed plate mounted on a Lulzbot Mini
The new ninjaflex mounting pads (that i printed on my new Prusa Mini) seem to be nearly perfect. The Prusa Mini bed plate sits very well and is surprisingly a very clean and nearly drop in replacement for the old crappy glass bed that Lulzbot uses. I think i may need to drill a few new holes in the prusa base plate on the bottom to secure this down solid, but as of now this thing probably could be wired up and tested. And to be honest i probably will.
Modified Prusa Mini bed plate to have countersunk holesPrusa Mini Bed Plate for Lulzbot Mini Modification
I’m thinking that the major change would be the z-offset height. If the z-offset height were adjusted properly and the lulzbot nozzle cleaning routine deleted i would foresee no major problems. Sure, bed levelling via washers will no longer be automatic, but who really cares that much. I’ve seen the old Lulzbot Taz 5 machines and they have no automatic bed levelling and they seem to work fine. This would be the fastest and easiest way to implement this mod. No changes in firmware, electronics, or extruder mods other than the bed itself.
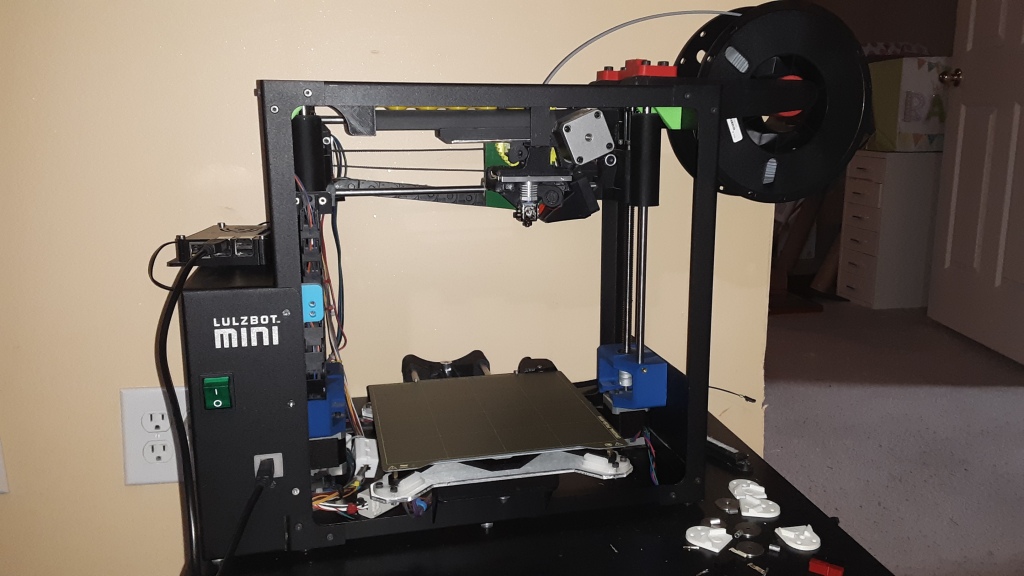
Lulzbot Mini with metal bed plate
I do however have some more plans for my Lulzbot 1 machine. The first is that i do plan on making an extruder mod that will implement the bed levelling sensor that Prusa uses on it’s machines. This will need to be done in concert with replacing the whole board with a new Einsy board. In my case ii have chosen to go with the Prusa version, the Einsy Rambo 1.2b from Ultimaker with the Prusa Bootloader, rather than the Einsy Retro that the Lulzbot Mini 2 uses.
Lulzbot Mini with metal bed plate
I decided on this route for several reasons. First I’m planning on making my own Prusa i3 MK3S clone from scratch and I’d like these two printers to have compatible electronics hardware and firmware. The second is that the Einsy Retro does not have the correct connector for the metal bed plate leveling sensor. I could probably hack together an adapter cable if i had to, but i don’t want to. Simplicity and swapability is what i want.
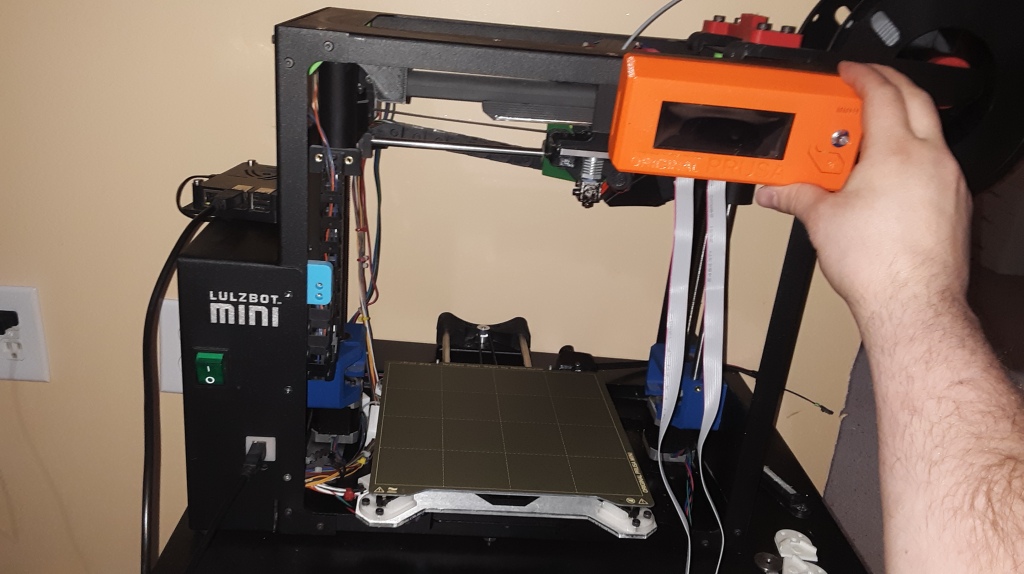
Previewing a possible LCD Mod for the Lulzbot Mini
Another plan i have for this machine is to finally give this machine an LCD screen. Something the original Lulzbot Mini was not capable with the mini rambo board that my machine used without some extensive hacking. I have again decided to use the Prusa i3 MK3S LCD screen from Printed Solid rather than use the same size that the Lulzbot Mini 2 is using.
Previewing a possible LCD Mod for the Lulzbot Mini
Why? Because of swapability and firmware sameness, but also because the Lulzbot Mini 2 LCD screen is $125!! No way is that LCD screen and 3D printed plastic worth that. None. I can go the Prusa route for much cheaper hands down. Besides, if I’m aiming for firmware compatibility with the Prusa i3 MK3S then i don’t want the same LCD screen that Lulzbot uses anyway.
New Electronics Einsy Rambo 1.2b Board for Lulzbot Mini with Prusa Bootloader from Ultimaker
I chose to get my electronics, the Einsy Rambo 1.2b and the LCD screen from U.S. sources rather than China because for me i not only wanted these quickly, but because i want peace of mind. I dont want to worry that the chinese engineers have replaced the trinamic stepper drivers with something cheaper or other cheap components and hope that they do not fail after 30 days of use. Plus the trinamic stepper drivers is one reason i wanted to upgrade the mini rambo board in my Lulzbot Mini in the first place. I want all my 3D printers to be as quiet as possible, and that is why i want trinamic stepper drivers.
Since getting my new Prusa Mini I’ve been using it mostly for printing with ninjaflex, believe it or not. My homemade lulzbot mini was able to print nylon but i was never able to use ninjaflex (without buying or making another printhead capable of doing so). I do plan to do that at some point, but the new Prusa Mini was advertised as being FLEX capable. And that is one of the main reasons i chose it. That and the flex build plate. And because Prusa is a trusted brand, and it was cheap, and Lulzbot let me down and went down in flaming ball of smoke more or less. Thanks Jeff Moe.
Some have said that a bowden-style printer, which is what the Prusa Mini has, are generally not friendly when it comes to printing flexible rubber filaments. I can now see why, as they are harder to feed through the long tube without the filament having issues. Despite this i have been printing very well with flexible filament, and using clear Ninjaflex specifically.
The Prusa Mini does not have a dedicated filament profile for ninjaflex, presumably because ninjaflex is on the very stretchy side of the TPU filament line and is the one most likely to cause issues. Despite this i have figured out how to use it without major issues. The only issues i had were when i was first feeding the filament into the extruder and setting the layer height on the first layer. In the prusa slicer i just picked the most detailed setting and the slowest setting possible under the generic FLEX filament settings. These seem to work okay actually.
In order to feed the Ninjaflex into the extruder i had to first take off my filament sensor module. With the filament sensor removed i fed the nijaflex through it first and then proceeded to insert it directly into the bowden motor. Once the motor had grabbed onto the ninjaflex i was then able to press the filament sensor back on and finish calibrating the first layer. I did run into an issue when i was trying to purge the PLA. At one point the ninjaflex got pushed too far past the feed screw and got stuck. I had to back it off and try again once i noticed it stopped feeding properly. Other than that the only other issue was calibrating the layer height properly so it would stick to the bed. Early on i had it set too far away from the bed to stick fully.
The first layer calibration for a smooth PEI plate for PLA was -0.650, and -0.875 for Ninjaflex on a textured bed plate. I heard the textured bed plate was designed specifically for flexible filaments and eliminating glue sticks so i got myself one. It seems to work really well, so i have no complaints. Way easier than the glass bed with PEI on my Lulzbot Mini. The fact that i have a smooth bed and a textured bed is not a bad thing since i will be upgrading / modding my Lulzbot Mini soon to have the exact same build plate the Prusa Mini is using. In fact, some of these Ninjaflex parts are for that exact Lulzbot Mini modification.
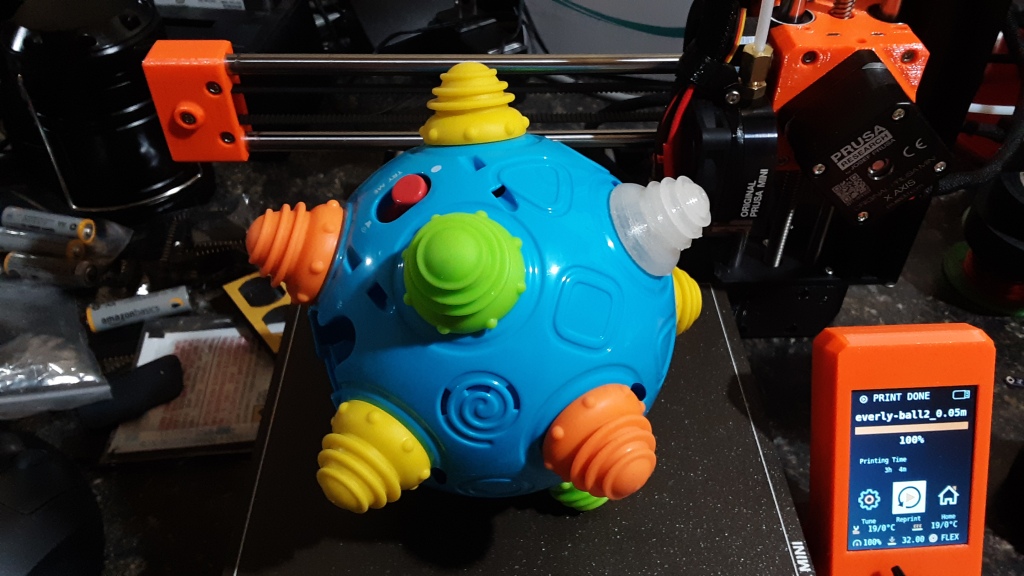
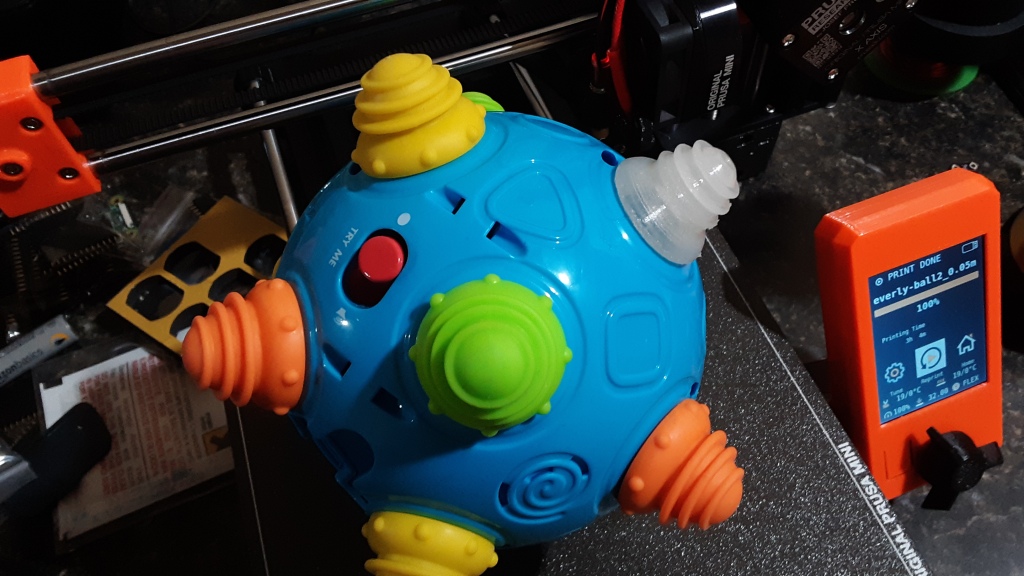
The reason I’m using clear ninjaflex material is because i am also modifying a bumble ball toy for my new 5 month year old daughter. I am planning on recreating something similar to the toy found in Star Trek Voyager: Friendship One. The one that lights up and plays a child rendition of Vivaldi’s Spring. After printing one test bumper and then tweaking my model i think the new print has come out very well. My prints for the prusa mini bed plate adapter for the lulzbot mini have also come out well, i am just waiting on some threaded standoffs so i can proceed with that mod / project. More updates on that to follow soon.
All in all I’m happy with my new Prusa Mini. The bed size is great, i have no stupid leveling washers to worry about, the bed is flexible to remove prints easily, and the machine is very capable for a decent range of filaments. Nylon would be nice, but with the almost inability to print with ninjaflex i probably wont push my luck.
This is a preview for an upcoming post and likely a series of posts about my progress for upgrading my slightly broken, slightly defunct home built Lulzbot Mini into a Lulzbot Mini – Prusa Mini Hybrid!
The short version is this: 1. I have an out of tune Lulzbot mini with a cracked glass bed with PEI. 2. Honestly i’m over the glass bed and would prefer a bendable bed like the new Prusa Mini. 3. Lulzbot left my city because of near bankruptcy and poor management leaving behind a lot of people without jobs. So I’m a little miffed at that. 4. It costs less to buy the spare parts for a Prusa Mini bed system and ship it here from Europe, than a new modular glass bed from Lulzbot. Sad. And 5. Lulzbot literally wont sell me a new aluminum bed plate so i can upgrade my mini to a Lulzbot Mini 2 (not sure i really need it, but i want it).
So, Yeah.
I got my new Prusa Mini 2 days ago. 🙂
I got my Prusa Mini spare parts bed today. 🙂 This IS happening. I don’t know how it will all go, but it WILL happen. I built my Lulzbot Mini from scratch. I’m fairly certain i’m one of two, maybe three people who have attempted to do so. If anyone can pull this off, i can. My name is Andrew Barney, I live in Loveland, Colorado, and I’m the random dude on the internet who is going to stick it to Lulzbot and basically more or less convert my Lulzbot Mini into a Prusa Mini.
p.s. here is the response i got from Lulzbot after waiting patiently since November 17th, 2019 for a reply!
Here is my original question:
Is there anyway to buy the aluminum build plate for a lulzbot mini 2? It is not currently listed on your website as a part for sale. I am still interested in possibly upgrading the build plate of my mini series 1 to have the new flipable PEI / bare glass bed.
This is the reply i got back on Apr 30, 2020, 12:23 PM:
Literally the worst customer service ever. I used to really like lulzbot. I really did. I never thought they were the best, but they were pretty good and open source and local, and a top leader in the 3D printing community. Sadly Jeff Moe ran it into the ground and left many people here in my town high and dry and without jobs or compensation or proper notice. And that is breaking the law when they knew for months they were treading water. Shady shady practices. Jeff Moe, you should be ashamed of yourself.
Anyway, sorry about the rant and the strong feelings i have towards a company i used to like A LOT. Oh well. They did not leave my town amicably anyway. As a former leader in the open source hardware arena, Lulzbot you really let us down.
But for those of you who already have a Lulzbot Mini, stay tuned for an exciting and much needed upgrade (or multiple upgrades)! When companies refuse to make the product you really want and keep ignoring what their customers really want, then time to hack and build it yourself!
So it seems that i have not updated my blog in quite awhile. Which is a shame really because a lot has happened and is still happening. Plenty of things people would find interesting. So rather than update you on everything I’ll plan on making little posts for each topic / update. (especially because i don’t have all my pictures on the computer yet).
For all you gardening / plant breeding enthusiast i will have a lot of interesting updates for you this year. Some interesting happenings include me working with a lab at Colorado State University. We are working hard to develop low cost open source soil sensors and a system for automatic garden / farm monitoring and irrigation use. VERY cool! I’ll probably put a post about that next!
For you 3d Printer enthusiasts i will have some interesting updates as well. I’ve got my new Prusa Mini on it’s way and should be delivered this week! In addition i have decided to fix / upgrade my half broken Lulzbot mini into a Lulzbot Mini 2 / Prusa Mini hybrid! I’ve already ordered the parts for a prusa mini flexible metal print bed to replace my broken glass print bed on my Lulzbot Mini. I will also be working to build my own Prusa i3 MK3S as well.
And for you computer, techie, and robotics enthusiasts you are in for a sneak peak of what i am doing at my day job. Should be a really treat. So stay tuned you guys. 🙂
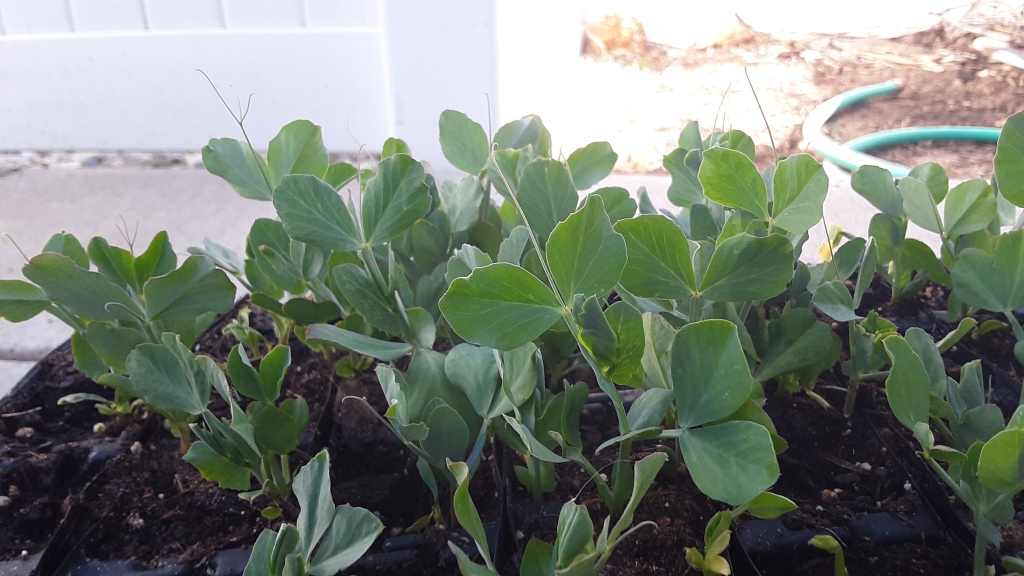
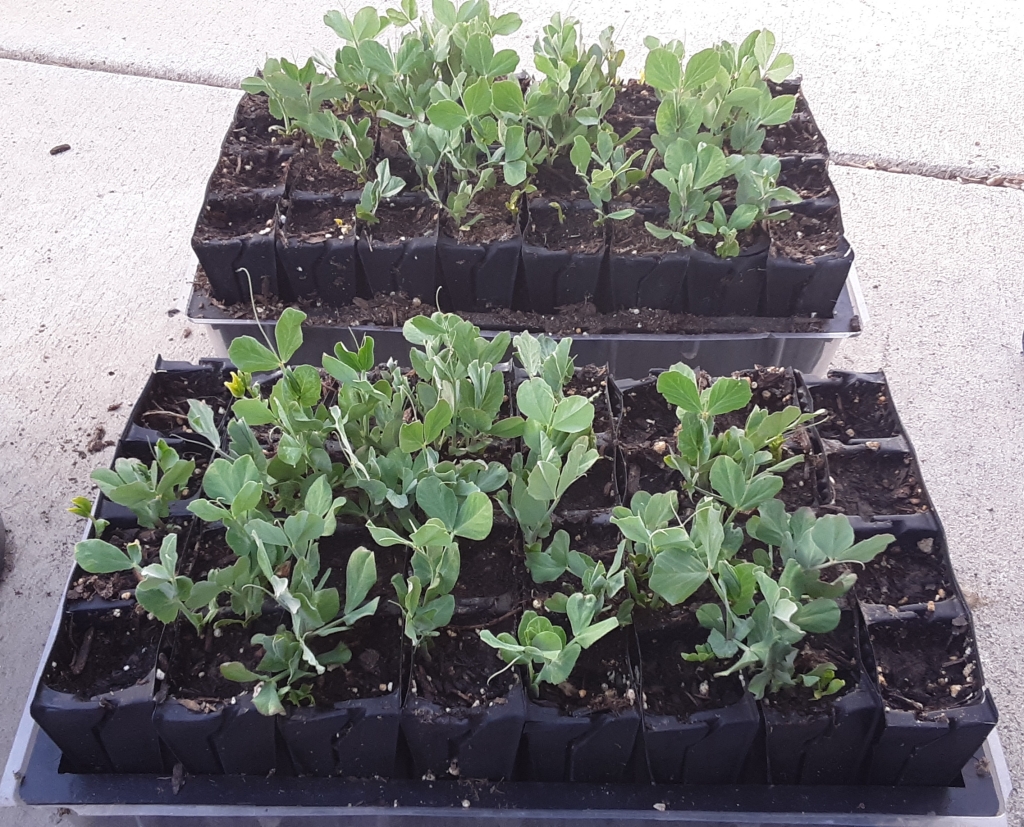
As for Peas, Beans, and Gardening things: I have built myself 2 okay-ish raised beds here at the rental property. I’ve planted 8 rows of peas in half of the tall one, tomatoes, peppers, lettuce, and purple basil in the other half.
10 plantings of watermelon / citron-watermelon hybrids (and one heirloom cantaloupe from texas Charley’s Pride Melon) in the short bed. And Purple Snow Peas and my Red Podded Peas and heirloom beans in the other tiny garden spot. I will be breeding the red podded peas (that don’t taste good but look great) with the purple snow peas that taste amazing. I also wanted to select the red podded peas that had the hyper-tendril (semi-leafless) as well so i planted my red podded peas in a root trainer. Sadly i see zero hyper-tendrils. So i will probably just have to select which plants look the healthiest and plant those.